

10 Clear Light Pink Dip Nails
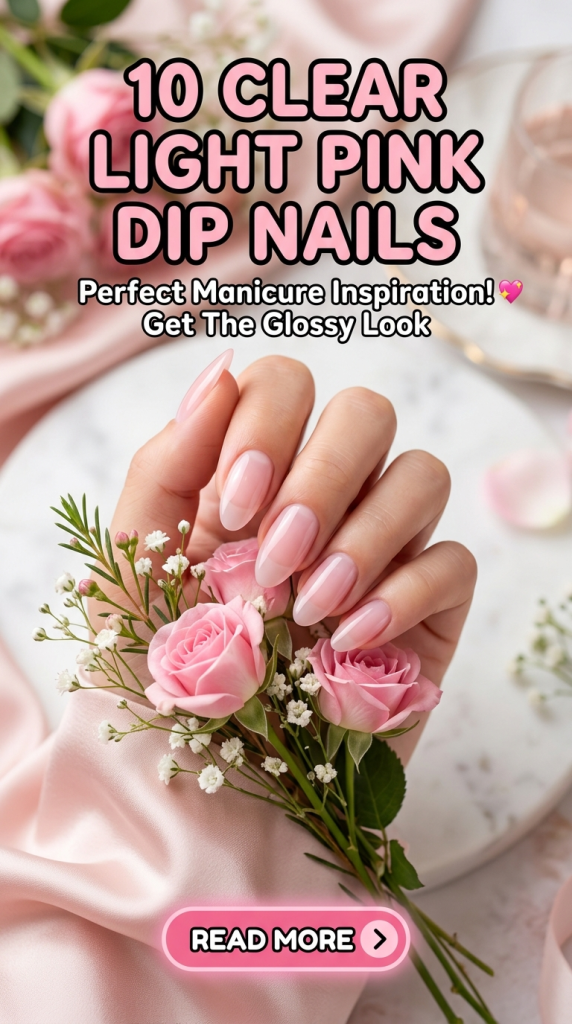
Clear light pink dip nails combine softness, transparency, and durability into one clean manicure concept. This nail style uses dip powder technology, which involves applying adhesive layers and dipping the nail into finely milled colored powder to create strength and pigmentation. A clear light pink variation blends sheer blush tones with translucent finishes, resulting in a natural yet polished look. On Pinterest, this manicure consistently appears among trending ideas because it complements every outfit, skin tone, and occasion. The aesthetic balances minimalism with subtle elegance. It works for professional settings, weddings, casual wear, and seasonal transitions. The clarity of the pink tone allows natural nail beds to show through while enhancing brightness and smoothness. Dip nails are known for their durability and resistance to chipping compared to traditional polish. With proper preparation and layering technique, the finish remains glossy and intact for weeks. This article presents ten detailed Pinterest-inspired clear light pink dip nail ideas, each with practical step by step application guidance and beginner friendly clarity to achieve professional results at home or in a salon.
Why Clear Light Pink Dip Manicures Continue to Trend
The popularity of clear light pink dip nails stems from their versatility and low-maintenance appearance. Many people search Pinterest for manicure inspiration that looks refined without appearing overly bold. The transparent blush tone enhances natural nail shape without overpowering it. This makes it ideal for both minimalist style preferences and soft glam aesthetics. Dip powder systems also offer structural strength, which helps protect natural nails from breakage. Unlike heavy acrylic enhancements, clear pink dip layers appear lightweight and breathable. The subtle color reflects light softly, creating a clean and aesthetic finish in photographs. This makes it particularly appealing on social media platforms where natural nail beauty trends dominate. Additionally, this manicure style grows out gracefully because the sheer tone blends seamlessly with the nail bed. The balance between practicality and elegance keeps it relevant year-round. Clear light pink dip nails provide a polished look without frequent salon visits, aligning with budget ideas and easy project beauty routines.
Preparation and Materials for a Smooth Dip Powder Application
Before creating clear light pink dip nails, proper preparation ensures smooth adhesion and longevity. Begin by sanitizing hands and tools thoroughly. Gently push back cuticles using a cuticle pusher and remove excess skin. Lightly buff the nail surface to eliminate shine and create texture for adhesion. Avoid aggressive filing to prevent thinning. Shape nails using a fine-grit file into square, almond, oval, or coffin shape depending on preference. Dust off debris before applying a base coat specifically designed for dip systems. Essential materials include clear light pink dip powder, base adhesive, activator liquid, top coat, buffer block, nail brush, and lint-free wipes. Apply thin, even layers to prevent bulkiness. After dipping, tap off excess powder and repeat layering until desired opacity is achieved. Seal with activator and shape edges carefully. Finish with a glossy top coat for shine. Preparation determines the final outcome. A well-prepped nail plate ensures even color distribution and long-lasting durability.
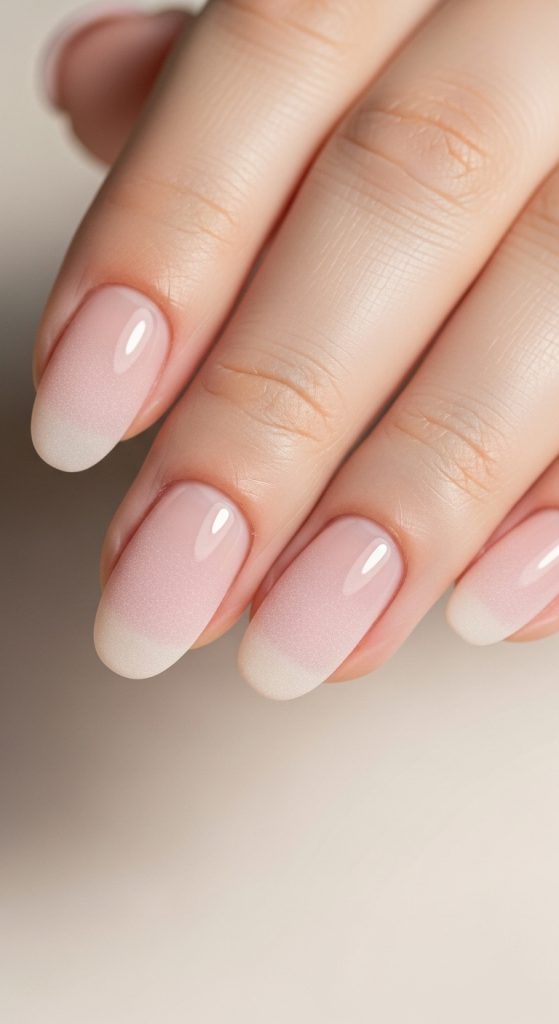
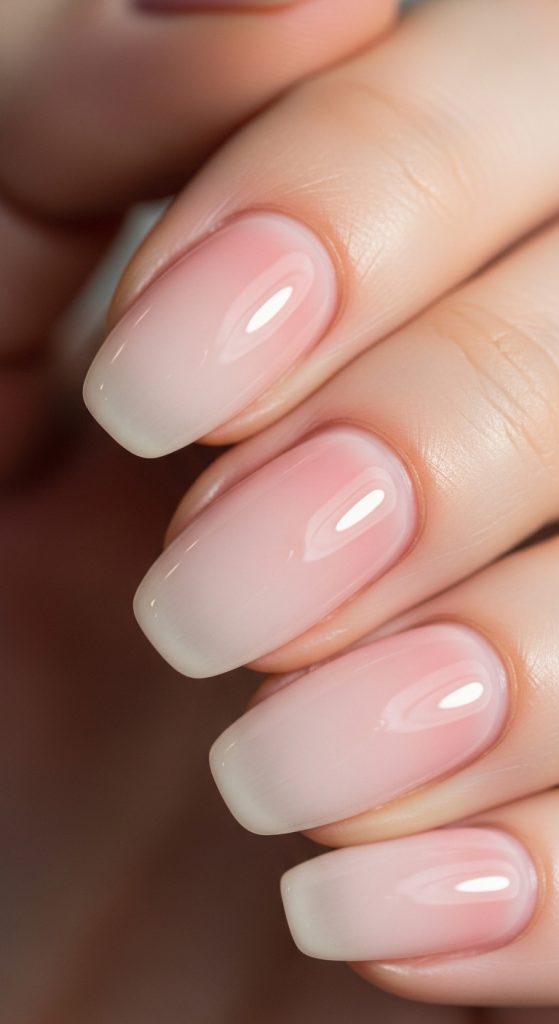
1. Sheer Blush Transparency
Step-by-Step Guide to a Natural Glass Finish
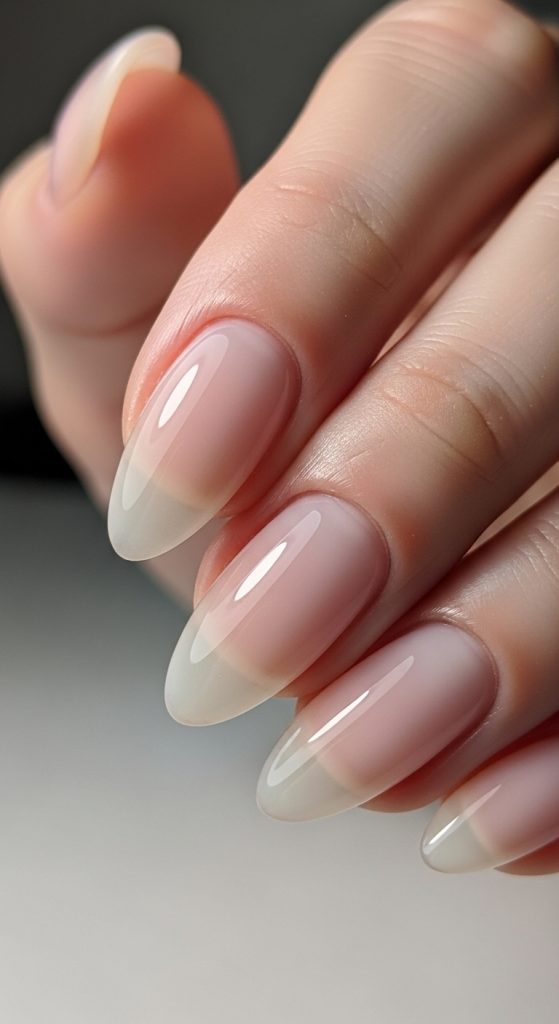
This variation emphasizes a barely-there pink tint. Apply a thin layer of base adhesive and dip once into clear light pink powder. Avoid multiple layers to maintain transparency. Tap off excess powder gently. Apply activator to harden the surface. Lightly buff to smooth uneven areas. Finish with glossy top coat. This method creates a glass-like finish that enhances natural nail tone. The sheer blush appearance suits professional environments and minimalist aesthetics. Maintain thin layers to prevent cloudiness. Proper buffing ensures clarity. This style aligns with Pinterest inspiration for clean and understated manicures.
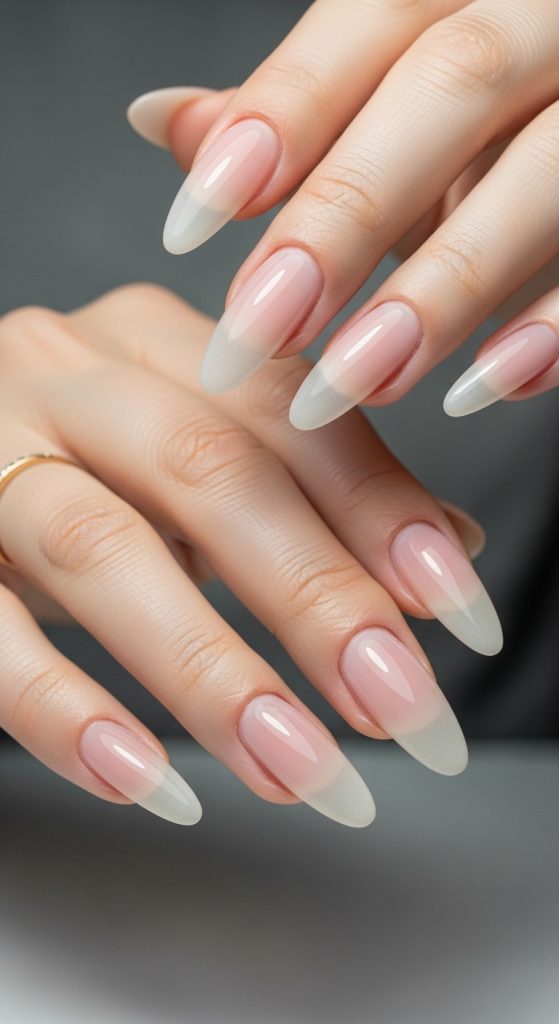
2. Almond-Shaped Soft Pink Dip
How to Shape and Apply for Elegance
File nails into almond shape before dipping. Apply two thin layers of clear pink powder for soft coverage. Seal with activator and smooth edges carefully. Almond shapes elongate fingers and enhance delicate tones. The combination creates a feminine and balanced look suitable for everyday wear.
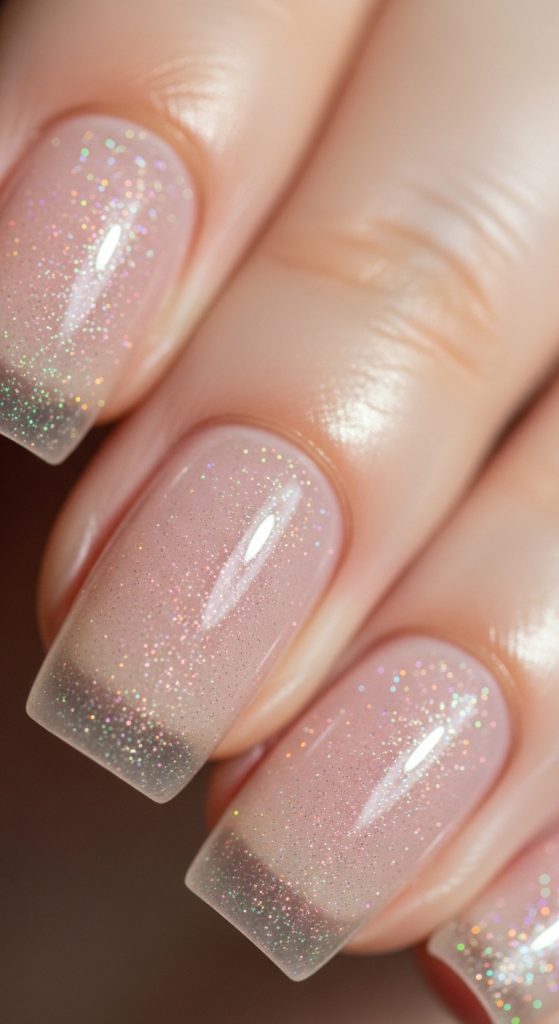
3. Clear Pink Dip with Subtle Glitter Overlay
Execution Process for Light Sparkle
After applying a base layer of clear pink dip, add a thin glitter dip coat over the top. Focus glitter near the tips for dimension. Seal with activator and glossy finish. The result adds subtle sparkle while maintaining transparency.
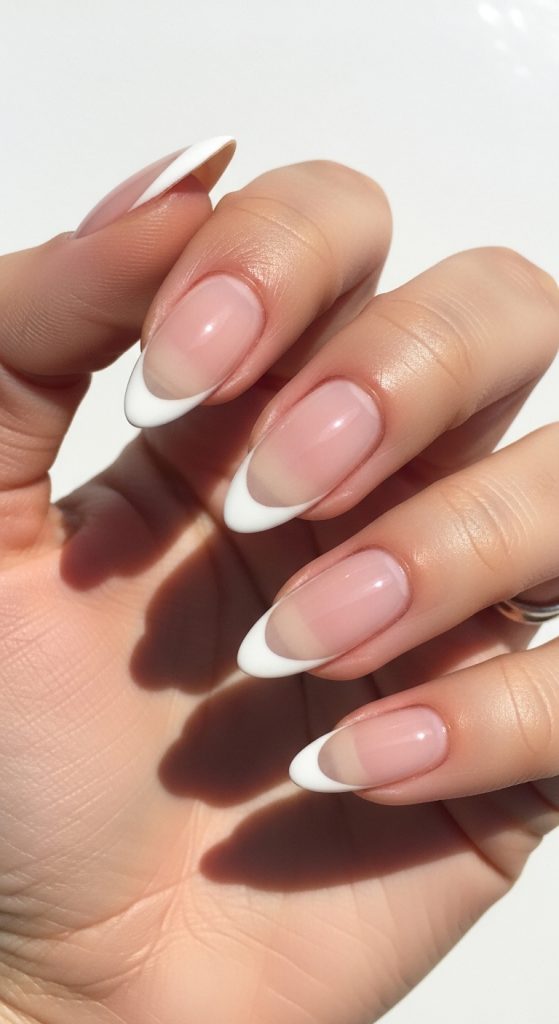
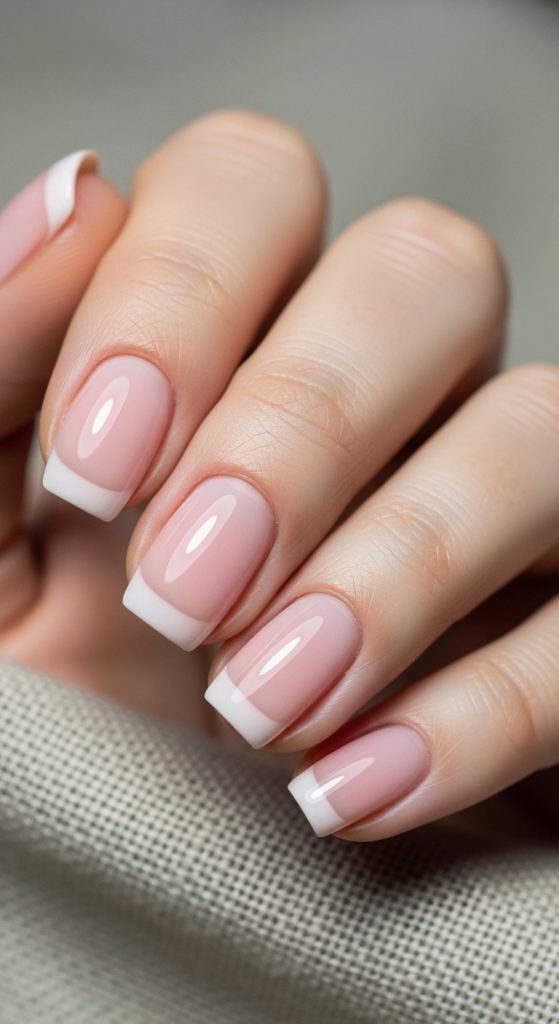
4. French Tip Clear Pink Base
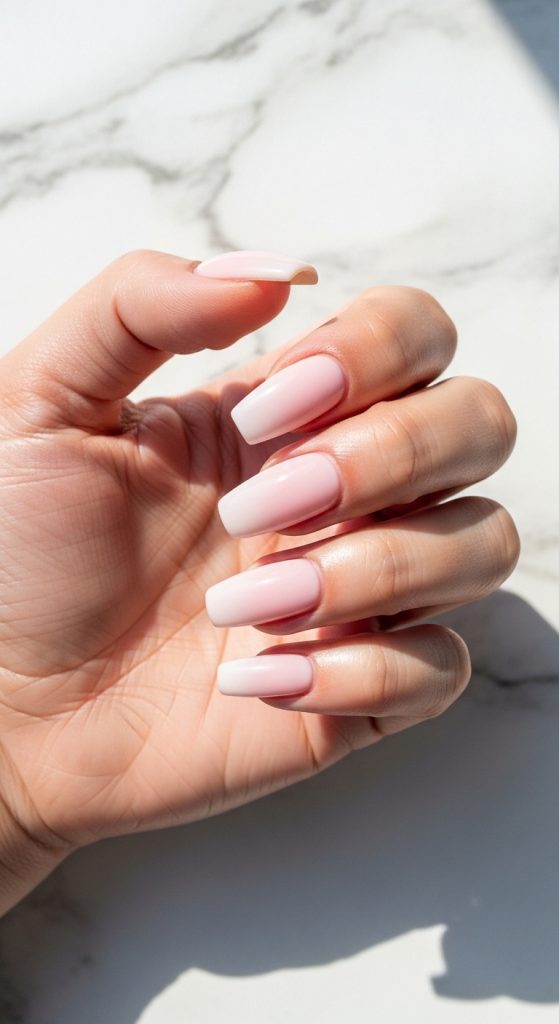
Step-by-Step for Classic Contrast
Create a clear pink dip base. Once hardened, apply white dip powder to tips using careful alignment. Seal and smooth. The pink base softens the contrast of traditional French manicures.
5. Coffin Shape Clear Pink Gloss
How to Maintain Clean Lines
Shape nails into coffin style before applying dip. Keep layers thin to prevent bulky appearance. Buff edges to maintain sharp lines. Glossy finish highlights clarity.
6. Matte Clear Light Pink Finish
Setup Method for Soft Texture
After sealing dip layers, apply matte top coat instead of gloss. This reduces shine while preserving color transparency. Matte finishes offer modern design contrast.
7. Clear Pink with Encapsulated Foil
Execution Strategy for Modern Accent
Apply clear pink base, then place tiny foil pieces onto nail before final dip layer. Seal with activator. The encapsulated effect keeps surface smooth.
8. Minimalist Short Oval Pink Dip
Step-by-Step Application for Short Nails
Keep nails short and oval-shaped. Apply one or two thin dip layers. Buff evenly. Short nails enhance practicality while maintaining aesthetic clarity.
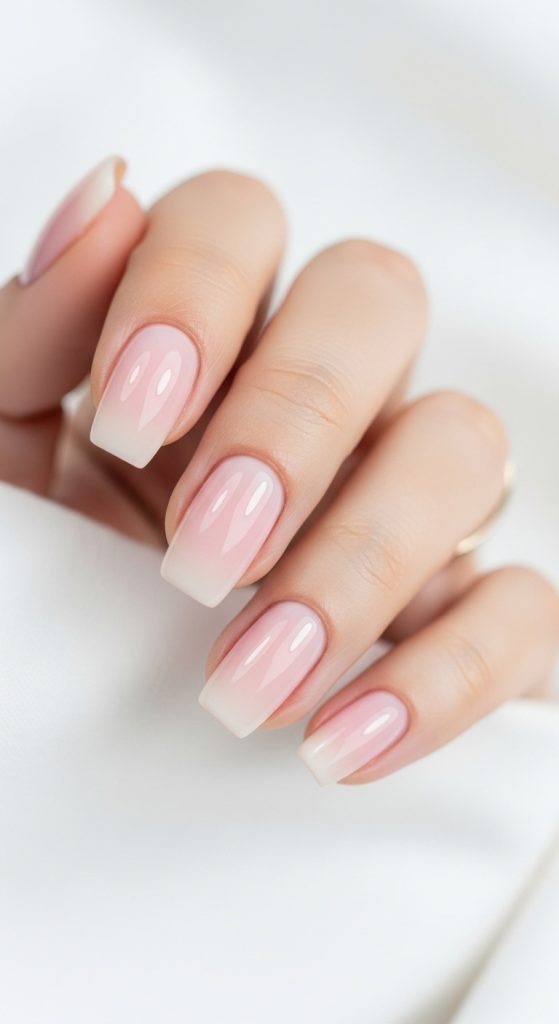
9. Ombre Clear Pink Fade
How to Blend for Soft Gradient
Apply clear pink dip at base. Gradually add slightly more opaque pink powder toward tips. Blend softly using brush. Seal and smooth.
10. Clear Pink Dip with Rhinestone Accent
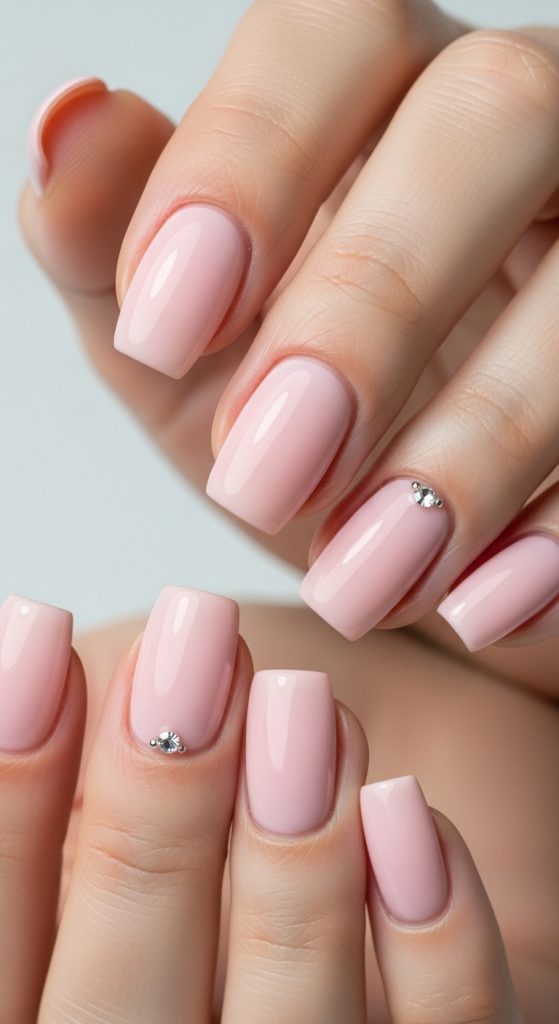
Execution Process for Subtle Glam
Complete clear pink dip application. Place one small rhinestone near cuticle before final top coat. Seal carefully. Minimal accents preserve elegance.
Common Beginner Mistakes and How to Avoid Them
Applying thick layers causes uneven surfaces. Skipping nail prep reduces adhesion. Over-buffing weakens nails. Maintain thin, even coats.
Practical Tips for Long-Lasting Results
Use cuticle oil daily. Avoid harsh chemicals without gloves. File gently if lifting occurs.
Styling and Presentation for Aesthetic Appeal
Keep cuticles moisturized. Coordinate nail length with lifestyle. Maintain consistent shape across all fingers.
Budget and Time Planning for Dip Maintenance
DIY dip kits reduce salon costs. Allocate two hours for careful application. Refill or remove after three weeks.
Expanding Creative Possibilities
Experiment with subtle pastel variations. Combine with negative space designs. Adjust gloss levels seasonally. Balanced creativity keeps clear light pink dip nails modern and refined.