10 Shaggy Hairstyles for Women Over 40 Ideas
Introduction
Shaggy hairstyles for women over 40 offer a practical and modern way to maintain volume, texture, and movement while supporting easy daily styling. These Pinterest ideas focus on structured layering techniques that enhance natural hair patterns and create a balanced appearance without requiring complex routines. A shaggy haircut is defined by its layered construction, which removes weight and adds dimension throughout the hair. This design works well for different hair types and face shapes, making it a versatile option for those seeking a refreshed and manageable look. In this article, readers will learn how to create and maintain shaggy hairstyles using step by step methods and accessible materials. Each idea is explained clearly to ensure beginner friendly execution while maintaining a polished and organized result. These creative ideas are useful for improving styling efficiency, reducing maintenance time, and achieving a consistent aesthetic that aligns with modern design preferences and practical daily routines.
Why This Idea Is Trending or Useful
Shaggy hairstyles have gained popularity because they provide a structured yet flexible approach to hair styling. Pinterest inspiration highlights how layered cuts create movement and volume without requiring heavy styling products or tools. This makes shaggy hairstyles a practical choice for women over 40 who prefer efficient routines and manageable hair lengths. The DIY appeal is strong, as many aspects of maintenance can be handled at home with basic materials and simple techniques. These styles are beginner friendly because they adapt to natural hair texture, reducing the need for constant adjustments. The design relevance lies in its ability to combine modern design elements with a relaxed aesthetic, making it suitable for both casual and professional settings. Budget ideas are supported since these hairstyles require fewer salon visits and minimal styling products. The balance between functionality, adaptability, and visual appeal makes shaggy hairstyles a widely used and practical option.
Materials and Preparation
Preparing for a shaggy hairstyle involves organizing basic tools and understanding the structure of layered cuts. Essential materials include scissors for trimming, a comb for sectioning, clips for dividing hair, and styling products such as lightweight mousse or leave-in conditioner. These materials help define layers and maintain texture. Preparation begins with washing and conditioning the hair to ensure a clean base. Detangle the hair gently using a wide-tooth comb to prevent breakage. Planning involves selecting a shaggy style that complements face shape and hair type. Consider the desired length and volume to maintain balance. Sectioning the hair properly is important for achieving even layers. Drying methods such as air drying or using a diffuser can be chosen based on preference. Organizing tools before starting ensures a smooth process. Proper preparation supports a structured approach, resulting in a hairstyle that is both functional and visually cohesive.
Idea 1: Classic Shoulder-Length Shag
How to Create
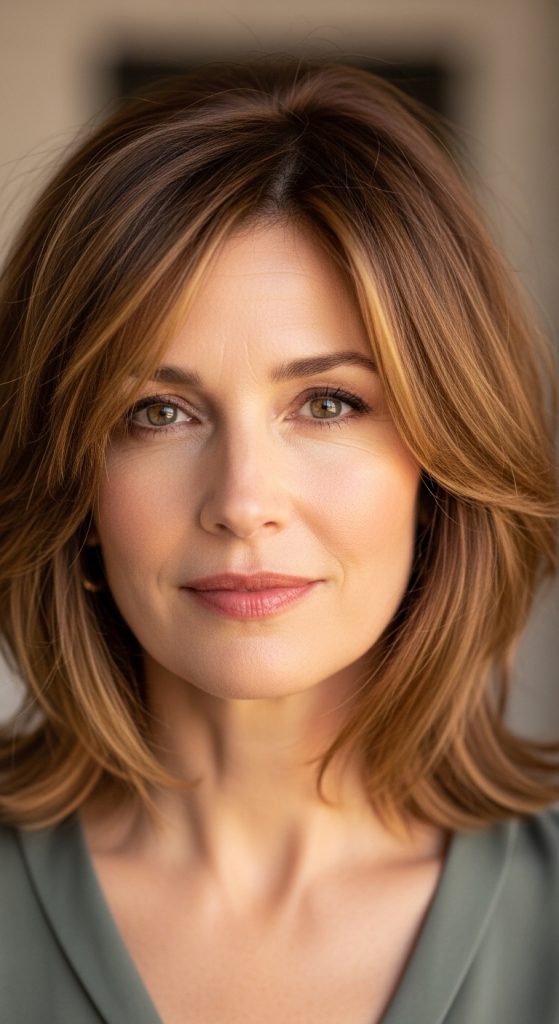
The classic shoulder-length shag is defined by evenly distributed layers that create movement and volume throughout the hair. This style maintains a balanced length while introducing texture that prevents the hair from appearing flat. The layering technique removes excess weight, allowing the hair to fall naturally into a structured shape. This design is suitable for various hair types and supports a clean and organized appearance. The shoulder-length cut ensures versatility, making it easy to style for different occasions. This approach aligns with modern design principles by combining simplicity with functionality.
To create this style, begin by sectioning the hair into manageable parts. Trim the length to shoulder level, ensuring even distribution. Add layers gradually, starting from the mid-lengths and working toward the ends. Use a comb to guide each section for accuracy. Apply a lightweight styling product to enhance texture and allow the hair to dry naturally. Regular trimming helps maintain the layered structure and prevents uneven growth. This step by step method ensures a consistent and practical shag hairstyle.
Idea 2: Short Textured Shag Cut

How to Make
A short textured shag cut focuses on creating volume and definition within a shorter length. This style uses layered sections to add movement while maintaining a compact shape. The shorter length reduces maintenance time and supports easy daily styling. The textured layers create a dynamic appearance that enhances natural hair patterns.
To achieve this look, trim the hair to a short length above the shoulders. Add layers throughout the hair, focusing on creating texture near the crown. Use a comb and scissors to define each section. Apply styling product to damp hair and scrunch gently to enhance texture. Allow the hair to dry naturally or use a diffuser for added volume. Regular maintenance ensures the layers remain defined and balanced.
Idea 3: Shaggy Bob with Soft Layers

Step-by-Step Guide
A shaggy bob combines the structure of a bob with the texture of a shag cut. This style creates a balanced shape while adding movement through soft layers. The design enhances facial framing and maintains a clean outline.
To create this style, cut the hair into a bob length just below the chin. Add soft layers throughout to create texture. Use a comb to guide the cutting process and ensure even distribution. Apply styling product to define layers and maintain shape. Regular trimming helps preserve the structure.
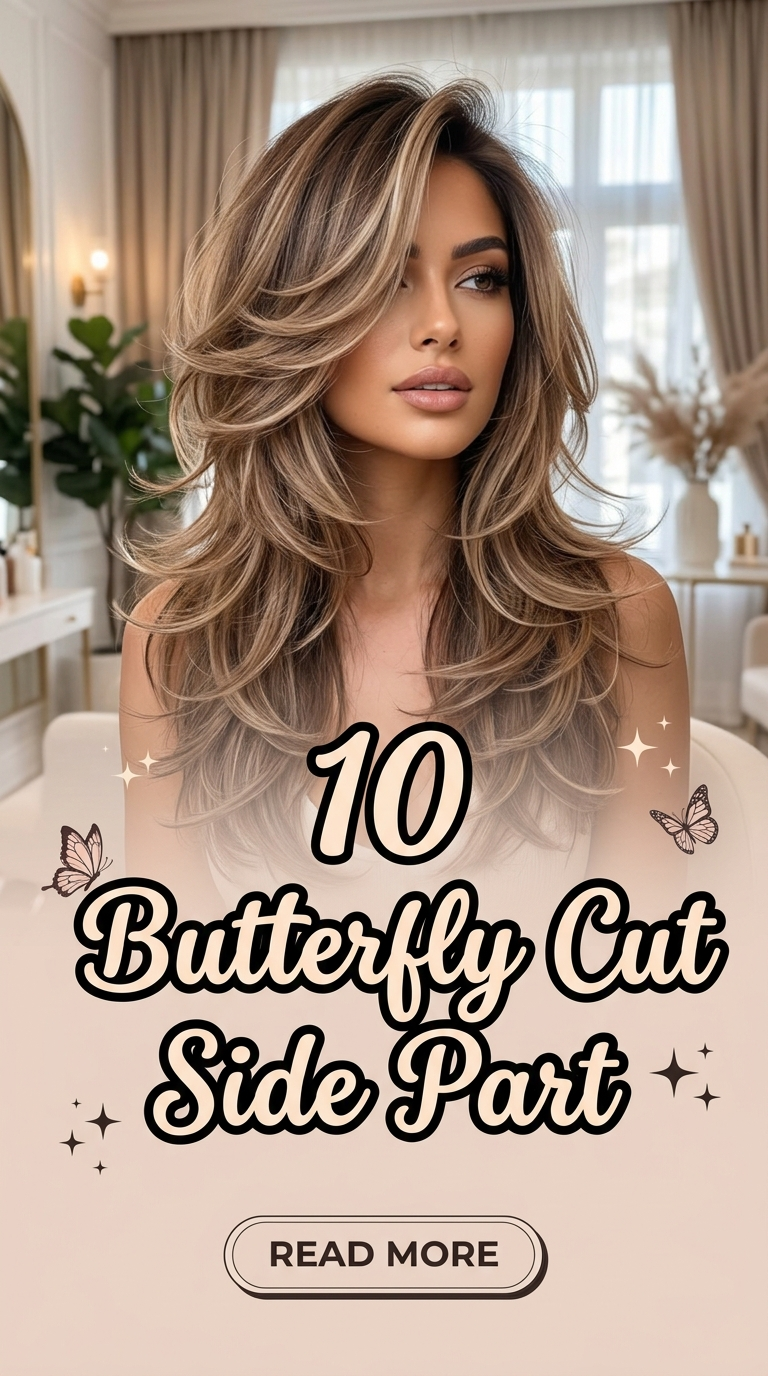
Idea 4: Layered Shag with Side Part
How to Create

A layered shag with a side part introduces asymmetry, which enhances facial structure. This design shifts volume to one side, creating a dynamic and balanced appearance. The layers add movement while maintaining a structured look.
To achieve this style, create a deep side part while sectioning the hair. Add layers evenly throughout. Apply styling product and allow the hair to dry naturally. Adjust the part regularly to maintain the desired shape.
Idea 5: Curly Shag Style
How to Create

A curly shag style focuses on enhancing natural curls while maintaining a layered structure. This design adds volume and definition, creating a balanced and textured look.
To create this style, trim the hair into layers that follow the natural curl pattern. Apply curl-enhancing product to damp hair. Allow the curls to form naturally while drying. Regular maintenance ensures the curls remain defined and structured.
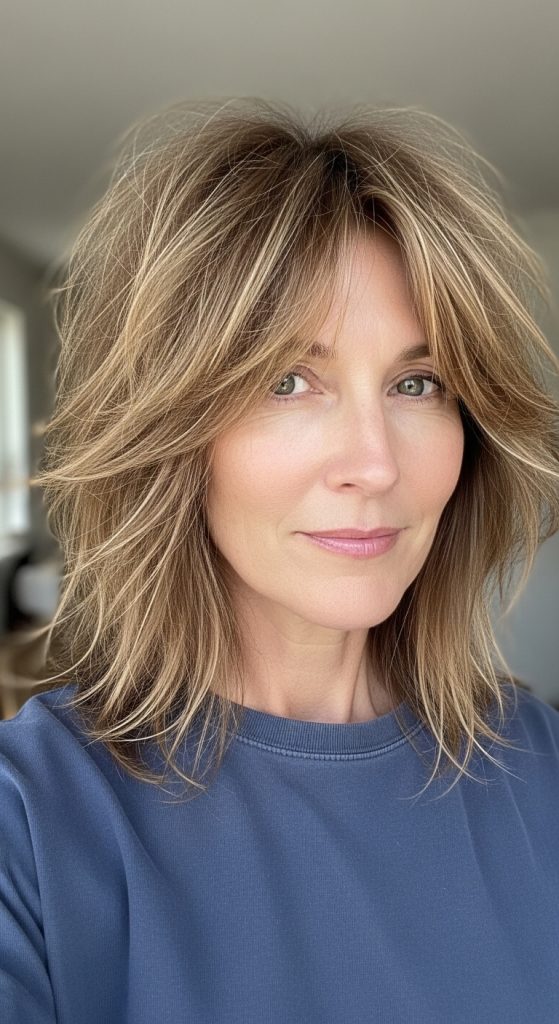
Idea 6: Feathered Shag Layers
Setup Method
Feathered shag layers create a soft and flowing appearance by tapering the ends. This style adds movement and reduces bulk, resulting in a lightweight and balanced look.
To achieve this, trim the hair into layers and taper the ends using a feathering technique. Apply styling product to enhance movement. Allow the hair to dry naturally and adjust as needed.
Idea 7: Shag with Curtain Bangs
Execution Process

A shag with curtain bangs adds framing around the face while maintaining layered texture. This design enhances facial features and creates a cohesive appearance.
To create this style, cut curtain bangs that blend into the layers. Apply styling product and shape the bangs using a comb. Maintain the style with regular trimming.
Idea 8: Voluminous Crown Shag

How to Make
A voluminous crown shag focuses on adding height at the top while maintaining layered texture throughout. This style enhances volume and creates a structured silhouette.
To achieve this, add shorter layers at the crown and longer layers below. Apply volumizing product and dry using a diffuser. Adjust the layers to maintain balance.
Idea 9: Messy Shag Look
Step-by-Step Guide
A messy shag look creates a relaxed and natural appearance while maintaining structure. This style emphasizes texture and movement.

To create this style, add uneven layers throughout the hair. Apply styling product and scrunch to create a slightly tousled effect. Allow the hair to dry naturally. Maintain the look with minimal adjustments.
Idea 10: Chin-Length Shag Cut

How to Create
A chin-length shag cut provides a compact and structured hairstyle. This design enhances facial framing and maintains a clean outline.
To achieve this, trim the hair to chin length and add layers evenly. Apply styling product to define texture. Regular maintenance ensures the style remains consistent.
Common Beginner Mistakes and How to Avoid Them
Common mistakes include uneven layering, overuse of styling products, and improper sectioning. These issues can affect the overall appearance and functionality of the hairstyle. Ensuring even sections and using appropriate amounts of product improves results. Regular maintenance prevents uneven growth.
Practical Tips for Better Results
Using lightweight styling products enhances texture without weighing down the hair. Regular trimming maintains the shape. Organizing tools and materials simplifies the process. Adjusting techniques based on hair type improves consistency.
Styling, Presentation, or Organization Ideas
Maintaining a clean styling area improves efficiency. Organizing tools ensures easy access. Coordinating hairstyle with personal style enhances the overall appearance. Consistent routines support better results.
Budget or Time Planning
Shaggy hairstyles require minimal cost and time compared to complex styles. Using basic materials reduces expenses. Planning the process ensures efficiency. Regular maintenance prevents additional work.
Creative Expansion and Advanced Inspiration
Advanced ideas include experimenting with different layering techniques, combining textures, or adjusting lengths for variation. These creative ideas allow for personalization while maintaining practicality. Continuous refinement ensures the hairstyle remains functional and visually appealing.