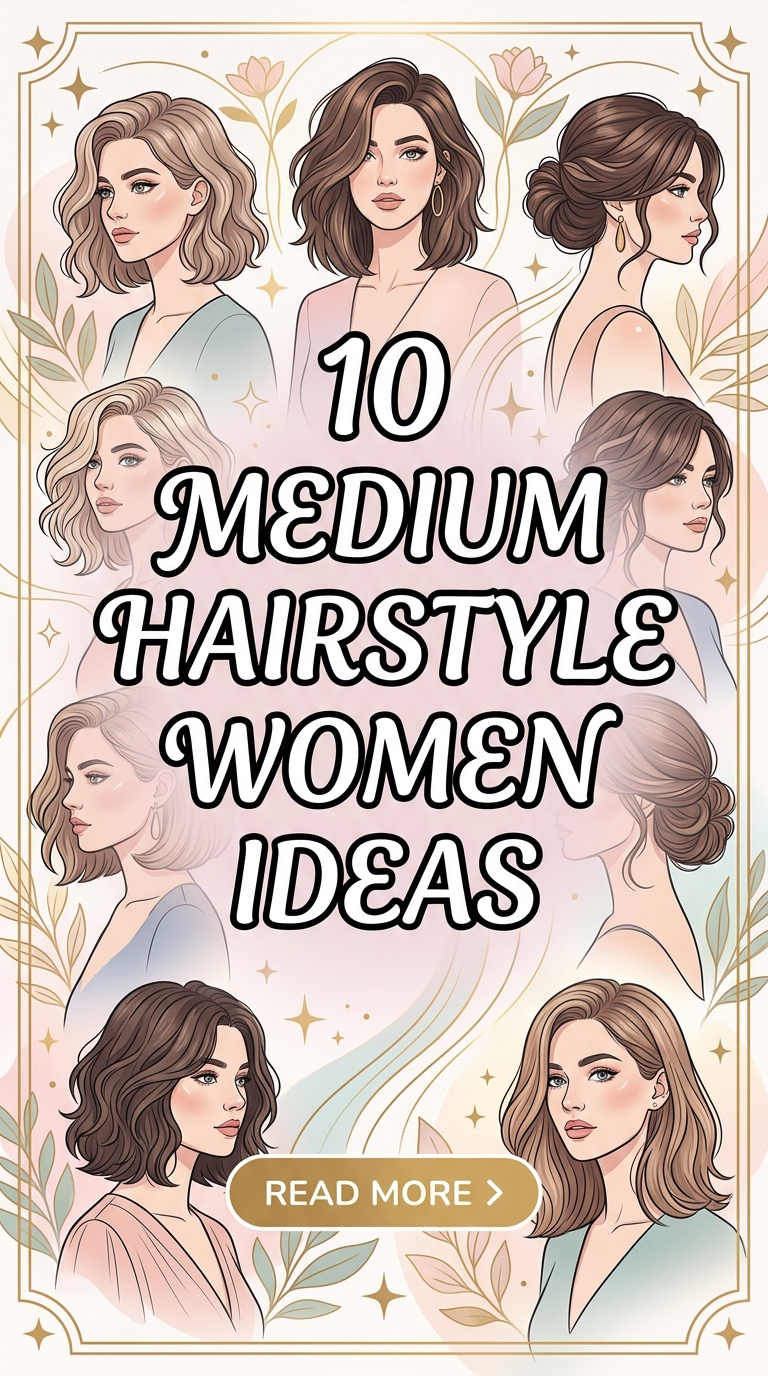

20 bun hairstyles aesthetic ideas
Bun hairstyles have evolved far beyond simple quick updos. Today, buns are one of the most versatile, stylish, and aesthetic hairstyles you can wear. From sleek minimalist styles to romantic textured looks, buns can be adapted for casual days, formal events, work settings, weddings, photoshoots, and everything in between. What makes bun hairstyles especially popular is their ability to balance practicality with elegance. They keep hair secured and off the face while still making a strong style statement.

Aesthetic bun hairstyles are all about intention. The placement, texture, accessories, and finish determine the overall vibe. A low sleek bun feels polished and refined. A messy high bun feels relaxed and effortless. A braided bun adds detail and dimension. With just slight adjustments, a bun can shift from minimalist to dramatic, from soft and romantic to edgy and bold.
Buns also work for all hair types and lengths. Whether you have straight, wavy, curly, coily, long, medium, or short hair, there’s a bun style that can flatter your features. Extensions and hairpieces can also be added for extra volume or length. Because buns are protective and low-manipulation, they are also great for maintaining hair health while still looking put together.
In this guide, you’ll discover 20 aesthetic bun hairstyle ideas that combine beauty, practicality, and modern trends. Each idea includes a clear explanation, step-by-step styling guide, and materials needed so you can recreate the look confidently. Whether you’re going for soft Pinterest-core vibes, clean girl aesthetic, romantic bridal elegance, or edgy street style, there’s a bun here for you.
Let’s start with the first 10 aesthetic bun hairstyle ideas.
Part 1: Ideas 1–10
1. Sleek Low Center-Part Bun
Introduction

The sleek low center-part bun is the definition of clean, minimalist elegance. This style has become a staple in the “clean girl aesthetic” trend because it looks polished, effortless, and timeless. It works beautifully for formal occasions, work environments, or even casual outings when you want to look put together without trying too hard.
The sharp center part combined with a smooth, tightly secured bun creates a refined silhouette. It highlights facial features and pairs well with bold earrings or subtle makeup looks.
What It Is
A tightly slicked low bun positioned at the nape of the neck with a defined middle part.
Step-by-Step How-To
- Start with detangled hair.
- Create a clean center part using a rat-tail comb.
- Apply smoothing gel evenly through hair.
- Brush hair downward toward the nape.
- Secure with a tight elastic.
- Twist ponytail into a bun and wrap around base.
- Secure with bobby pins.
- Lay edges for a polished finish.
Materials Needed
- Rat-tail comb
- Strong-hold gel
- Brush
- Hair elastic
- Bobby pins
- Edge control
This bun is sleek, timeless, and effortlessly aesthetic.
2. Messy High Bun with Face-Framing Strands
Introduction
The messy high bun gives off a soft, carefree aesthetic that feels romantic and relaxed. Unlike structured buns, this one embraces texture and loose strands for a natural finish. It’s ideal for casual outings, coffee dates, or cozy content days.

Face-framing pieces soften the look and add dimension, making the hairstyle appear intentionally undone rather than sloppy.
What It Is
A high-positioned bun styled loosely with strands left out around the face.
Step-by-Step How-To
- Gather hair into a high ponytail.
- Twist loosely and wrap into bun shape.
- Secure lightly with pins.
- Pull out a few strands near temples.
- Lightly curl face-framing pieces if desired.
- Spray lightly for hold.
Materials Needed
- Hair elastic
- Bobby pins
- Light hairspray
- Curling wand (optional)
This style feels soft, effortless, and photogenic.
3. Braided Crown Bun

Introduction
The braided crown bun blends elegance with intricate detail. It’s perfect for weddings, special events, or romantic aesthetics. The braided element adds texture while the bun keeps the style secure.
This look appears complex but can be achieved with simple braiding techniques.
What It Is
Hair braided along the hairline and gathered into a low or mid bun.
Step-by-Step How-To
- Section front hair for braiding.
- Create a Dutch or French braid along crown.
- Gather remaining hair into low ponytail.
- Wrap ponytail into bun.
- Secure braid into bun base.
Materials Needed
- Comb
- Hair elastic
- Bobby pins
- Light hairspray
This style adds romantic detail to classic buns.
4. Sleek High Ballet Bun

Introduction
Inspired by dancers, the sleek high ballet bun is structured, symmetrical, and elegant. It elongates the neck and highlights cheekbones beautifully.
This bun works well for formal events and minimalist fashion aesthetics.
What It Is
A smooth, tight bun placed high on the crown.
Step-by-Step How-To
- Brush hair upward smoothly.
- Secure in high ponytail.
- Twist tightly and wrap around base.
- Secure with pins.
- Smooth flyaways with gel.
Materials Needed
- Strong brush
- Elastic
- Bobby pins
- Styling gel
A refined and graceful hairstyle.
5. Low Textured Boho Bun
Introduction
The low textured boho bun is relaxed, romantic, and slightly undone. It pairs beautifully with soft waves and natural makeup.
What It Is

A loose bun placed low with textured volume.
Step-by-Step How-To
- Curl hair loosely.
- Gather into low ponytail.
- Twist loosely and secure.
- Pull sections gently for fullness.
Materials Needed
- Curling iron
- Elastic
- Bobby pins
Perfect for weddings or soft aesthetic looks.
6. Space Buns

Introduction
Space buns are playful and trendy. They create a youthful and edgy aesthetic.
What It Is
Two symmetrical buns placed high on each side of the head.
Step-by-Step How-To
- Part hair down the middle.
- Create two high ponytails.
- Twist each into bun shape.
- Secure tightly.
Materials Needed
- Comb
- Two elastics
- Bobby pins
Fun and bold aesthetic style.
7. Twisted Side Bun
Introduction

The twisted side bun adds asymmetry and sophistication.
What It Is
Hair twisted and secured into a bun positioned to one side.
Step-by-Step How-To
- Create deep side part.
- Twist hair toward one side.
- Form bun near ear.
- Secure with pins.
Materials Needed
- Elastic
- Bobby pins
Elegant and unique look.
8. Bubble Bun
Introduction
The bubble bun gives a modern, creative twist on traditional buns.

What It Is
Ponytail segmented with elastics before wrapping into bun.
Step-by-Step How-To
- Create ponytail.
- Add elastics down length.
- Gently tug sections for “bubble” effect.
- Wrap into bun shape.
Materials Needed
- Multiple small elastics
- Bobby pins
Playful and trendy aesthetic.
9. Half-Up Bun (Hun)
Introduction
The half-up bun blends relaxed and polished vibes.
What It Is

Top section styled into bun while bottom remains loose.
Step-by-Step How-To
- Section top half of hair.
- Secure into mini ponytail.
- Wrap into bun.
- Leave bottom loose.
Materials Needed
- Elastic
- Bobby pins
Chic everyday aesthetic.
10. Braided Low Bun
Introduction
This bun combines braiding and elegance for a detailed finish.
What It Is
Hair braided before wrapping into bun.
Step-by-Step How-To
- Braid ponytail fully.
- Wrap braid into bun.
- Secure tightly.
Materials Needed

- Elastic
- Bobby pins
Structured yet feminine style.
11. Sleek Low Bun with Hair Accessories
Introduction

If you love minimalist hairstyles but want something slightly elevated, adding delicate accessories to a sleek low bun instantly transforms the look. This style maintains the clean elegance of a traditional low bun while incorporating aesthetic details like pearl pins, gold cuffs, minimalist barrettes, or dainty clips. It’s perfect for weddings, formal events, date nights, or content-worthy photoshoots.
Accessories allow you to customize the vibe. Pearls create a romantic, bridal aesthetic. Gold accents give a modern luxury feel. Minimal silver clips lean toward contemporary chic. The key is balance—keeping the bun sleek and structured so the accessories stand out without overwhelming the style.
What It Is
A smooth low bun styled at the nape of the neck, enhanced with strategically placed decorative hair accessories.
Step-by-Step How-To
- Create a clean center or side part.
- Apply smoothing gel and brush hair into a low ponytail.
- Twist ponytail tightly and wrap into bun.
- Secure firmly with bobby pins.
- Gently insert accessories along one side or around the bun base.
- Finish with shine spray for polish.
Materials Needed
- Rat-tail comb
- Strong-hold gel
- Hair elastic
- Bobby pins
- Decorative hair clips or pearl pins
- Shine spray
This bun feels timeless yet elevated with subtle detailing.
12. Curly High Puff Bun

Introduction
The curly high puff bun celebrates natural volume and texture while maintaining a playful aesthetic. This style works beautifully for curly and coily hair types, allowing natural definition to shine. It’s bold, youthful, and effortlessly stylish.
Unlike sleek buns, the high puff embraces fullness. It creates a rounded silhouette that draws attention upward and highlights facial features. This look pairs beautifully with statement earrings and glowing makeup.
What It Is
Natural curls gathered into a high puff positioned on the crown of the head.
Step-by-Step How-To
- Moisturize and define curls with curl cream.
- Flip hair forward and gather into high ponytail.
- Secure with a soft elastic or puff band.
- Fluff curls for even shape.
- Lay edges lightly for contrast.
Materials Needed
- Curl-defining cream
- Wide elastic band
- Edge control
- Hair pick (optional for volume)
This style is bold, natural, and full of personality.
13. Romantic Loose Low Bun with Tendrils
Introduction

The romantic loose low bun is perfect for weddings, proms, and elegant evenings. This style focuses on softness, texture, and delicate face-framing tendrils. It feels dreamy and effortlessly beautiful.
Unlike tightly secured buns, this look uses gentle movement and loose sections to create volume and dimension. It pairs well with soft waves and natural makeup for a cohesive aesthetic.
What It Is
A loosely twisted low bun with curled tendrils left around the face.
Step-by-Step How-To
- Curl entire head lightly for texture.
- Gather hair into low ponytail without pulling too tight.
- Twist and wrap into loose bun.
- Secure with pins while keeping softness.
- Pull out small front sections and curl them gently.
- Finish with flexible-hold hairspray.
Materials Needed
- Curling iron
- Elastic
- Bobby pins
- Light hairspray
This bun radiates romance and softness.
14. Slicked Back Wet-Look Bun

Introduction
The wet-look bun is bold, modern, and runway-inspired. It gives off a high-fashion aesthetic and works beautifully for editorial photoshoots or sleek night-out looks. The glossy finish creates drama while keeping the structure simple.
This style highlights bone structure and pairs beautifully with statement makeup or minimalist outfits.
What It Is
A tightly slicked bun with high-shine gel creating a wet, glossy finish.
Step-by-Step How-To
- Apply generous amount of high-shine gel to damp hair.
- Comb hair straight back without part.
- Gather into mid or low ponytail.
- Twist into tight bun and secure.
- Smooth surface again with gel for extra shine.
Materials Needed
- High-shine styling gel
- Fine-tooth comb
- Hair elastic
- Bobby pins
This look is sleek, bold, and fashion-forward.
15. Double Braided Bun
Introduction

The double braided bun adds intricate detail while remaining structured. It combines braids and a bun into one cohesive design, making it perfect for events where you want something unique but not overly complicated.
The braids add visual interest, making the bun look more complex and textured.
What It Is
Two braids created from ponytail sections, wrapped together into a bun.
Step-by-Step How-To
- Secure hair into ponytail.
- Divide ponytail into two sections.
- Braid each section individually.
- Wrap both braids around base together.
- Secure firmly with pins.
Materials Needed
- Hair elastic
- Bobby pins
- Comb
This bun feels detailed and structured.
16. Low Bun with Middle Twist Detail
Introduction

This bun adds subtle creativity by incorporating a twist along the center part before forming the bun. It’s elegant yet slightly different from a traditional sleek bun.
The twist adds dimension and makes the style feel intentional and Pinterest-ready.
What It Is
Hair parted down the middle with both sections twisted before securing into a low bun.
Step-by-Step How-To
- Create clean middle part.
- Twist each front section toward the back.
- Combine twists into low ponytail.
- Wrap ponytail into bun.
- Secure with pins.
Materials Needed
- Rat-tail comb
- Elastic
- Bobby pins
This look is subtle yet eye-catching.
17. Messy Textured High Bun

Introduction
The messy textured high bun is perfect for casual days with a stylish edge. It gives off effortless “model off-duty” vibes while still looking intentional.
Volume and texture are key to achieving the right aesthetic.
What It Is
A loosely gathered high bun with teased volume and texture.
Step-by-Step How-To
- Add dry shampoo or texturizing spray.
- Tease crown lightly.
- Gather into high ponytail.
- Twist loosely and secure.
- Pull pieces gently for fullness.
Materials Needed
- Texturizing spray
- Elastic
- Bobby pins
Relaxed and stylish everyday look.
18. Braided Space Buns
Introduction
Braided space buns combine playful energy with added detail. Instead of plain buns, braiding the hair before wrapping adds structure and texture.
This style works beautifully for festivals, photoshoots, or bold fashion moments.
What It Is
Two braids created and wrapped into buns on each side of the head.

Step-by-Step How-To
- Part hair down the middle.
- Create two high ponytails.
- Braid each ponytail.
- Wrap each braid into bun shape.
- Secure tightly.
Materials Needed
- Comb
- Elastics
- Bobby pins
Playful yet detailed aesthetic.
19. Low Bun with Scarf Wrap
Introduction
Adding a scarf to a bun instantly enhances the aesthetic. This style is soft, feminine, and perfect for summer or vacation looks. Scarves allow you to introduce color and pattern.
It’s also protective and gentle on the hair.
What It Is

A low bun wrapped partially or fully with a decorative scarf.
Step-by-Step How-To
- Create low bun.
- Fold scarf into long strip.
- Wrap around bun base.
- Tie securely underneath.
- Adjust ends for style.
Materials Needed
- Hair elastic
- Bobby pins
- Silk or satin scarf
Chic, soft, and versatile.
20. Twisted Rope Bun
Introduction
The twisted rope bun looks intricate but is surprisingly simple to create. It involves twisting sections tightly to form a rope-like texture before wrapping into a bun.
This style feels modern and structured while remaining elegant.
What It Is
Hair twisted into rope sections and wrapped into a tight bun.
Step-by-Step How-To

- Secure hair into ponytail.
- Divide ponytail into two sections.
- Twist both sections tightly.
- Twist sections around each other.
- Wrap into bun and secure.
Materials Needed
- Hair elastic
- Bobby pins
- Comb
This bun is sleek, structured, and visually striking.