
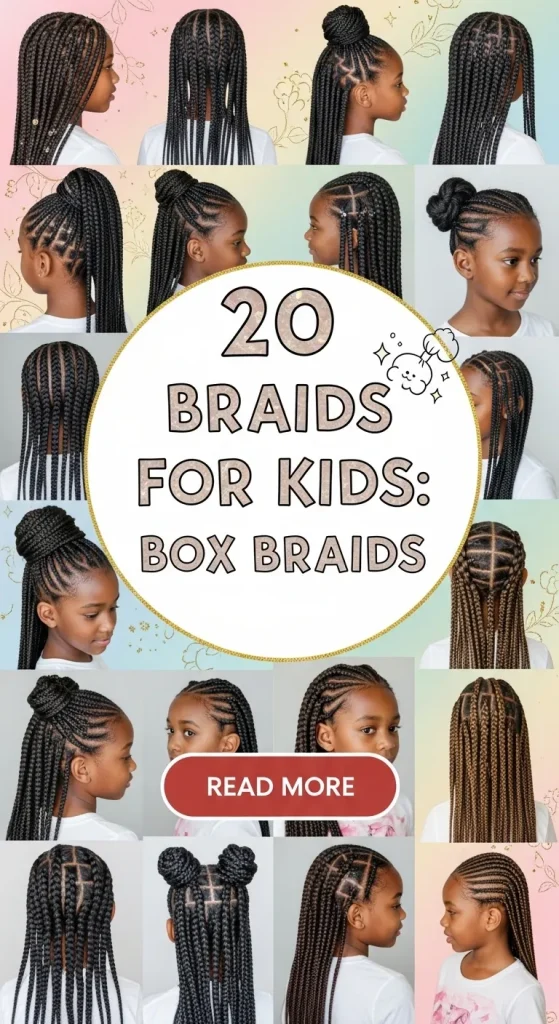
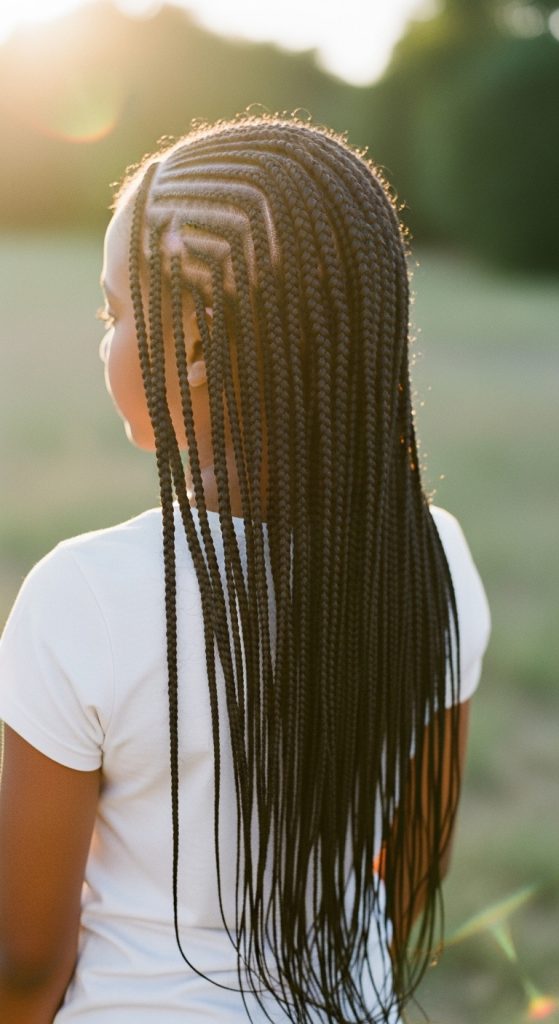
20 braids for kids box braids
Box braids for kids are one of the most versatile, protective, and stylish hairstyles you can choose. They are timeless, practical, and endlessly customizable — making them a favorite for parents and a fun fashion statement for children. Whether you’re preparing for a new school term, a birthday party, a family vacation, or simply looking for a low-maintenance hairstyle that will last for weeks, box braids are a reliable and beautiful option.
What makes box braids especially perfect for kids is their flexibility. You can choose different lengths, sizes, parting designs, accessories, and even color combinations. From classic natural tones to playful beads and curls, there are endless ways to personalize the look while still keeping it age-appropriate. Box braids also help protect natural hair by reducing daily manipulation, minimizing tangles, and supporting healthy hair growth when installed correctly.
Parents appreciate that once box braids are done, daily styling becomes easier. Mornings are smoother because there’s no need for constant detangling or restyling. With proper care — such as moisturizing the scalp, wrapping hair at night, and avoiding excessive tension — box braids can last two to four weeks comfortably for kids.
Another reason box braids are Pinterest-favorite hairstyles is their photogenic appeal. Clean parting lines, neat braids, and decorative elements like beads, cuffs, bows, or curls create stunning, save-worthy inspiration images. Whether you prefer jumbo braids for a bold look or small braids for maximum versatility, there’s a style here for every child.
In this guide, you’ll discover 20 detailed box braid ideas for kids. Each idea includes a clear explanation, beginner-friendly step-by-step instructions, and a materials list to help you recreate the look at home or communicate exactly what you want to your stylist.
Let’s begin with Part 1: Ideas 1–10.
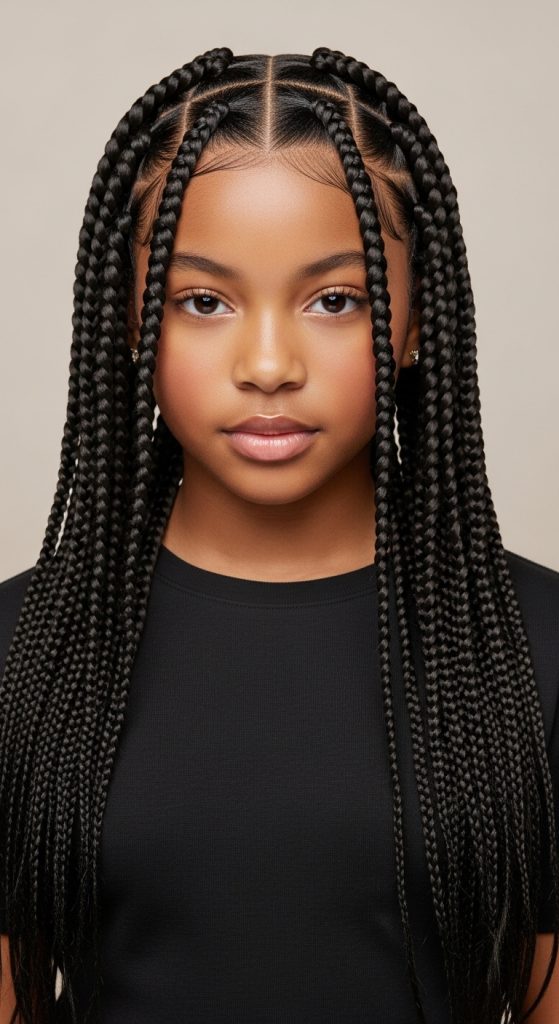
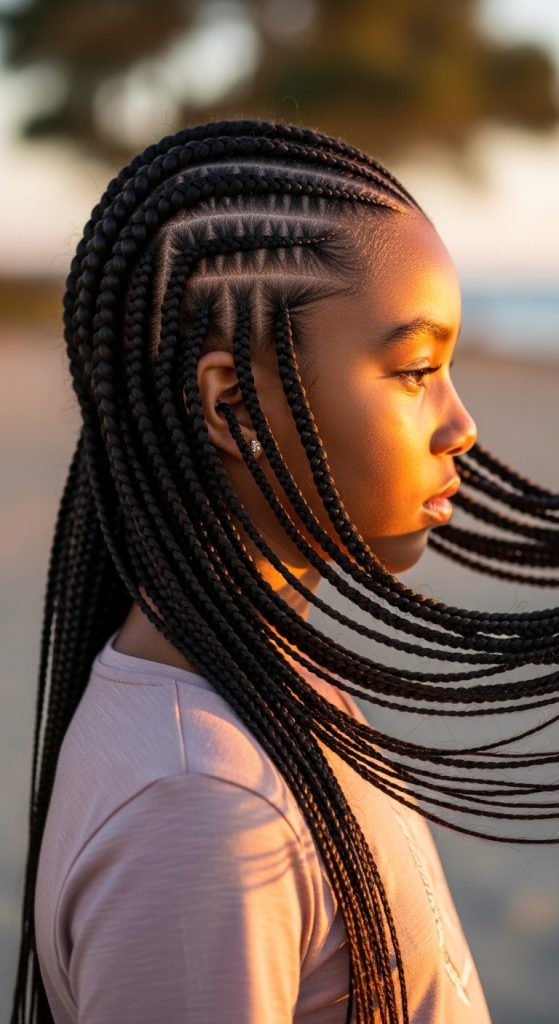
1. Classic Medium Box Braids
Introduction
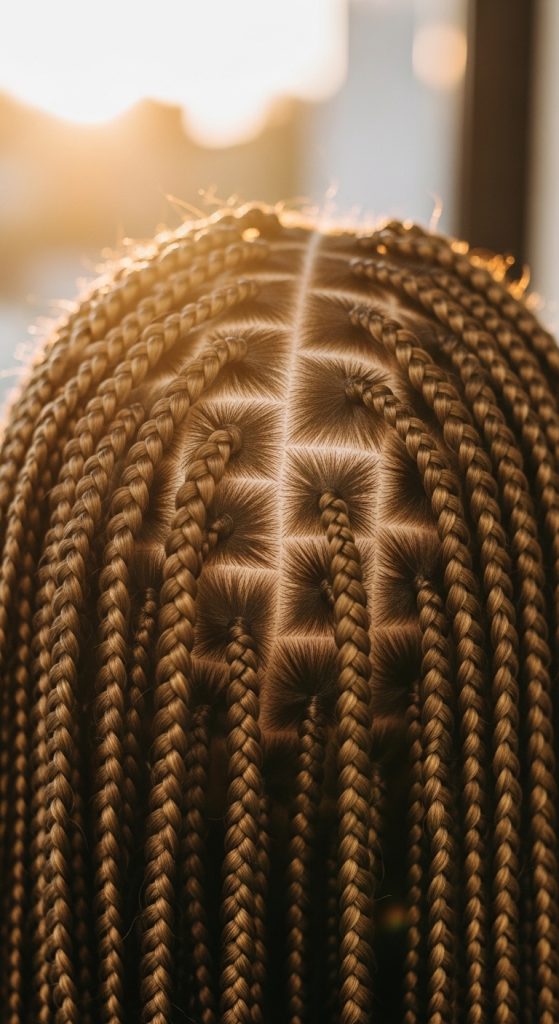
Classic medium box braids are the foundation of all braided styles. They are not too small and not too large, making them comfortable, practical, and ideal for children of all ages. This style balances durability with lightweight comfort, which is especially important for kids.
This timeless braid style works well for school, family events, and everyday wear. It’s easy to maintain and can be styled into ponytails, buns, or half-up looks.
What This Style Is
Medium-sized individual braids sectioned into clean square parts across the scalp.
Step-by-Step How to Do It
- Wash, condition, and fully dry the hair.
- Stretch the hair gently using braids or low heat.
- Section hair into neat square parts using a rat-tail comb.
- Apply braiding gel at the root for clean grip.
- Attach extension hair (optional) and braid down evenly.
- Seal ends with hot water if using synthetic hair.
- Apply braid mousse to reduce frizz.
Materials Needed
- Braiding hair extensions (optional)
- Rat-tail comb
- Hair clips
- Braiding gel
- Elastic bands
- Braid mousse
Pinterest Tip: Clean, straight parting lines make this classic style look salon-perfect.
2. Jumbo Box Braids for Kids
Introduction
Jumbo box braids are bold, trendy, and quicker to install than smaller braids. For kids who prefer sitting for less time during styling, jumbo braids are a great option. They are lightweight when done properly and give a statement look without overwhelming the scalp.
This style is especially cute for vacations and summer months.
What This Style Is
Large individual box braids with bigger square parting sections.
Step-by-Step How to Do It
- Start with clean and detangled hair.
- Create larger square sections evenly across the scalp.
- Apply gel to each section.
- Add extension hair if desired.
- Braid firmly but gently to avoid tension.
- Dip ends in hot water to seal.
Materials Needed
- Jumbo braiding hair
- Rat-tail comb
- Gel
- Hair clips
- Hot water bowl
Pinterest Tip: Accessorize jumbo braids with gold cuffs for a trendy look.
3. Small Box Braids with Beads
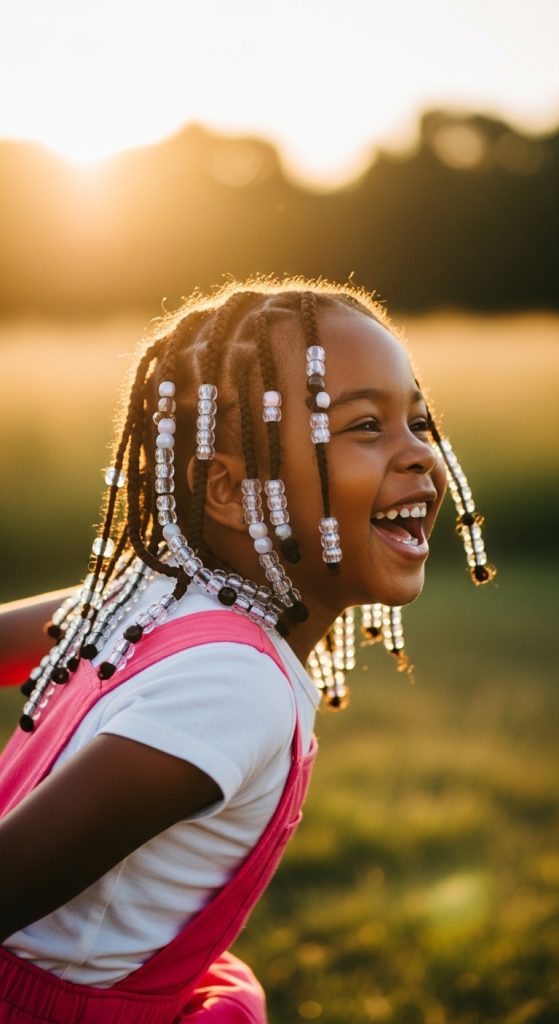
Introduction
Small box braids offer maximum styling flexibility. Adding beads makes the style playful and perfect for younger kids. The beads add movement and personality while keeping the look neat and polished.
This is a fantastic option for birthdays and special occasions.
What This Style Is
Small, neat box braids decorated with colorful or clear beads at the ends.
Step-by-Step How to Do It
- Section hair into small squares.
- Apply braiding gel for smoothness.
- Braid evenly with or without extensions.
- Use a beading tool to thread beads onto each braid.
- Secure beads with small elastics.
Materials Needed
- Braiding hair (optional)
- Beads
- Beading tool
- Gel
- Elastic bands
Pinterest Tip: Clear beads sparkle beautifully in natural sunlight photos.
4. Box Braids Bob (Short Length)
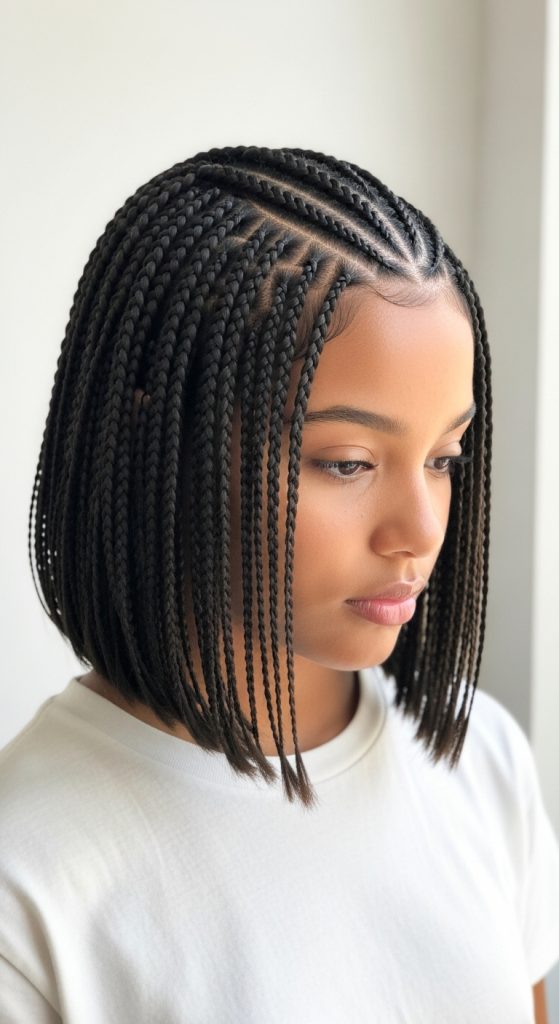
Introduction
A box braid bob is stylish, manageable, and age-appropriate. The shorter length makes it lighter and easier for active kids to wear comfortably. It’s also quicker to install than longer braids.
This is a perfect back-to-school hairstyle.
What This Style Is
Box braids cut to chin or shoulder length.
Step-by-Step How to Do It
- Create medium square sections.
- Braid to desired short length.
- Dip ends in hot water to seal.
- Trim evenly for a clean finish.
- Apply mousse to smooth.
Materials Needed
- Braiding hair
- Comb
- Gel
- Hot water bowl
- Towel
Pinterest Tip: Slightly curl the ends for a soft, playful finish.
5. Box Braids with Curly Ends
Introduction
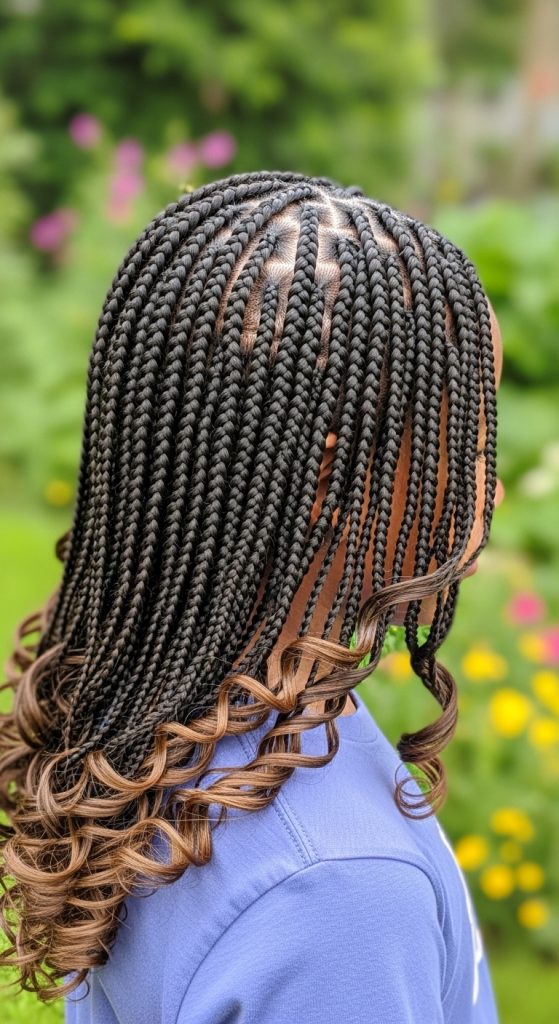
Box braids with curly ends combine structure with softness. The straight braided section transitions into loose curls at the ends, creating a fun, bouncy look that kids love. This style feels elegant yet playful.
It’s perfect for family photos or formal events.
What This Style Is
Standard box braids that stop a few inches before the end, leaving curly extension hair loose.
Step-by-Step How to Do It
- Section hair evenly.
- Attach pre-curled braiding hair.
- Braid until a few inches from the end.
- Leave remaining hair curly.
- Apply mousse lightly to curls.
Materials Needed
- Pre-curled braiding hair
- Rat-tail comb
- Gel
- Hair clips
- Braid mousse
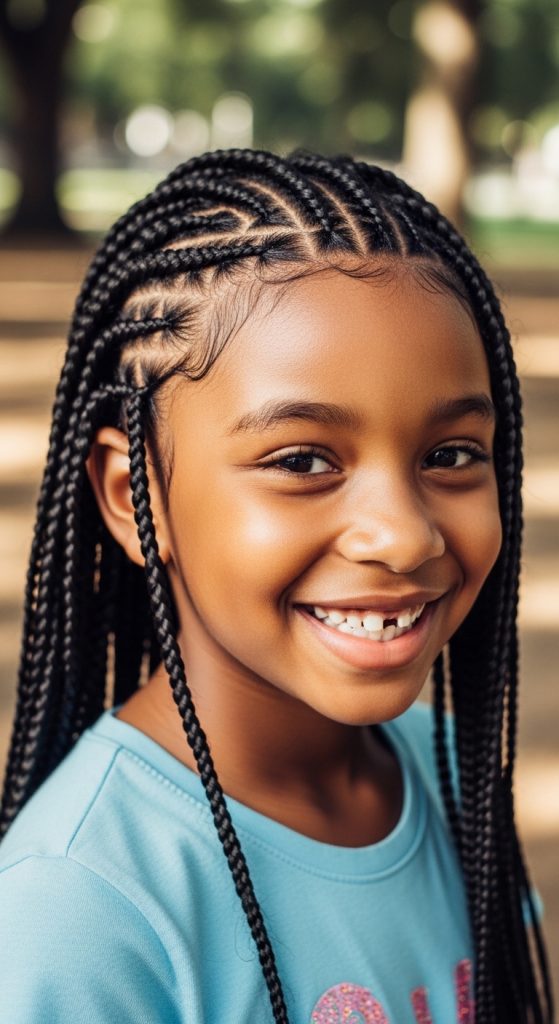
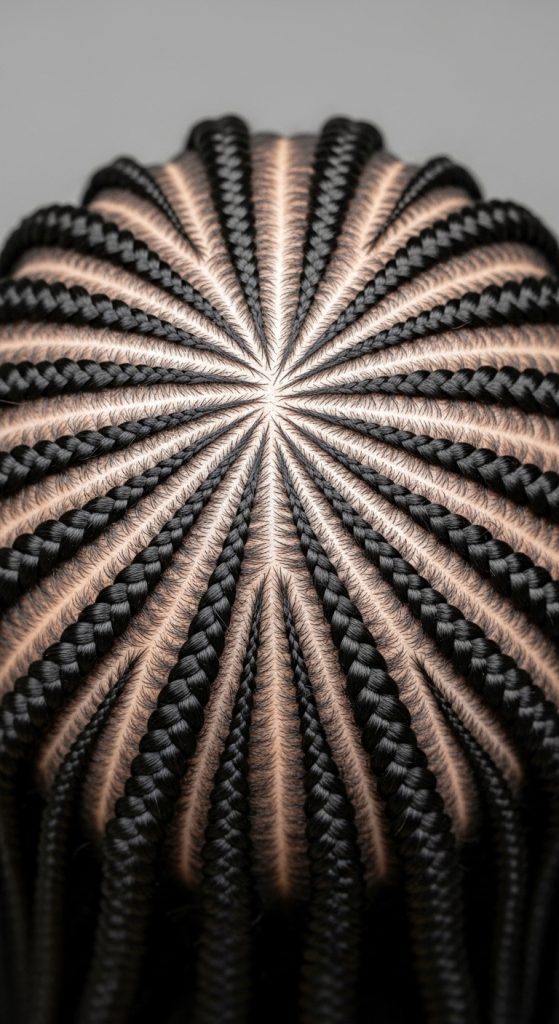
6. Knotless Box Braids for Kids
Introduction
Knotless box braids are one of the most comfortable braid options for kids. Unlike traditional box braids that begin with a tight knot at the root, knotless braids start with the natural hair and gradually feed in extension hair. This technique reduces scalp tension, making it ideal for children with sensitive scalps.
Parents love knotless braids because they look more natural at the root and feel lighter. Kids love them because they’re easier to move, style, and wear in ponytails or buns without discomfort. This style is protective, neat, and long-lasting when properly maintained.
What This Style Is
Individual box braids installed using the feed-in method, creating a flat, seamless look at the roots.
Step-by-Step How to Do It
- Wash, deep condition, and fully dry the hair.
- Stretch hair gently to reduce shrinkage.
- Section into neat square parts.
- Apply a small amount of braiding gel at the root.
- Begin braiding with natural hair only.
- Gradually feed in small pieces of extension hair.
- Continue braiding to desired length.
- Dip ends in hot water to seal.
- Apply braid mousse to reduce frizz.
Materials Needed
- Pre-stretched braiding hair
- Rat-tail comb
- Braiding gel
- Hair clips
- Hot water bowl
- Towel
- Braid mousse
Pinterest Tip: Knotless braids lay flatter and look extra neat in high ponytail styles.
7. Box Braids with Color Highlights
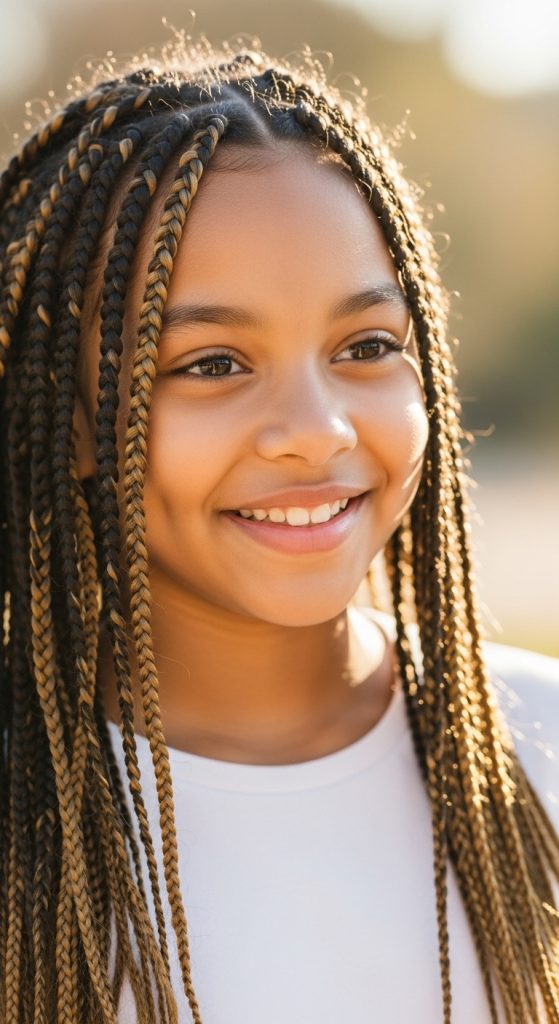
Introduction
Adding subtle color highlights to box braids is a fun way to personalize the style without committing to a full head of bright extensions. For kids, soft brown, honey blonde, burgundy, or even pastel streaks can add dimension while keeping the look age-appropriate.
This style works beautifully for kids who want something unique but not overly bold. Highlights can be placed strategically throughout the head for a balanced, blended effect.
What This Style Is
Classic box braids with a few colored braids placed throughout for contrast.
Step-by-Step How to Do It
- Section hair evenly into square parts.
- Install mostly natural or black braiding hair.
- Every 4–5 sections, insert a colored extension braid.
- Keep color placement evenly distributed.
- Dip ends in hot water to seal.
- Apply mousse for shine.
Materials Needed
- Natural tone braiding hair
- Highlight color braiding hair
- Rat-tail comb
- Braiding gel
- Hair clips
- Hot water bowl
Pinterest Tip: Concentrate highlights around the front for a face-framing effect.
8. Half-Up Half-Down Box Braids
Introduction
The half-up half-down box braid style is perfect for kids who want versatility. It keeps hair out of the face while allowing the length to flow freely down the back. This look feels playful, stylish, and perfect for school or special events.
It’s especially great for medium to long box braids and works beautifully with beads or cuffs for extra personality.
What This Style Is
Box braids styled with the top half gathered into a ponytail or bun while the bottom half remains down.
Step-by-Step How to Do It
- Install box braids throughout the head.
- Separate the top half from ear to ear.
- Gather the top section into a ponytail or small bun.
- Secure with a soft elastic band.
- Smooth edges and apply light mousse.
Materials Needed
- Elastic band
- Edge control
- Edge brush
- Braid mousse
- Hair accessories (optional)
Pinterest Tip: Wrap a braid around the ponytail base for a polished finish.
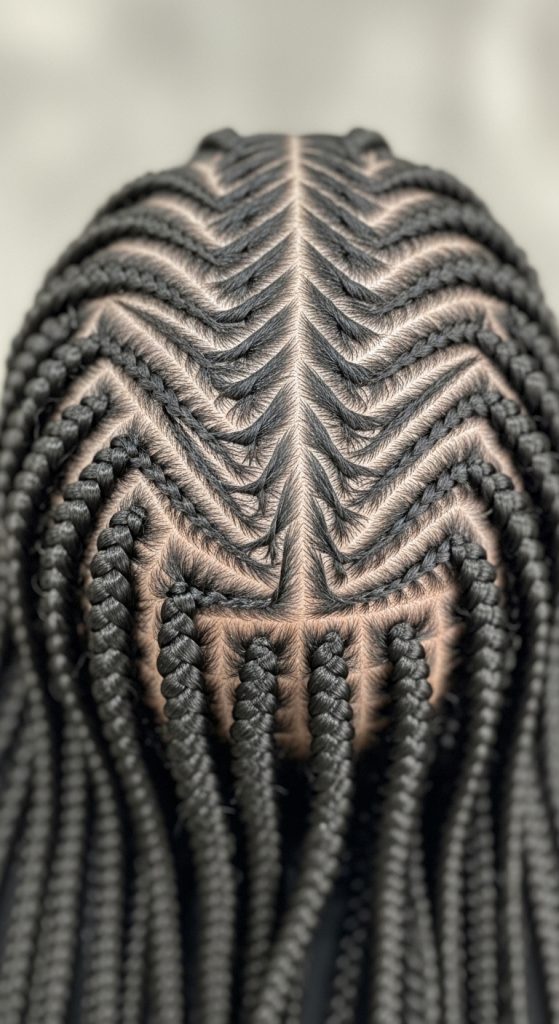
9. Triangle Part Box Braids
Introduction
Triangle part box braids are a creative twist on the traditional square parting pattern. Instead of standard box-shaped sections, the scalp is divided into triangular shapes, creating a geometric, eye-catching design.
This style adds a trendy detail while maintaining the protective benefits of box braids. It’s perfect for kids who want something slightly different but still practical for everyday wear.
What This Style Is
Individual box braids installed using triangular parting sections instead of square parts.
Step-by-Step How to Do It
- Detangle and stretch hair.
- Use a rat-tail comb to create clean triangular sections.
- Clip away surrounding hair while working.
- Apply braiding gel at each root.
- Install braids evenly throughout the head.
- Dip ends in hot water to seal.
- Apply mousse for a sleek finish.
Materials Needed
- Braiding hair
- Rat-tail comb
- Braiding gel
- Hair clips
- Hot water bowl
- Braid mousse
Pinterest Tip: Triangle parts look especially stunning in top-view hairstyle photos.
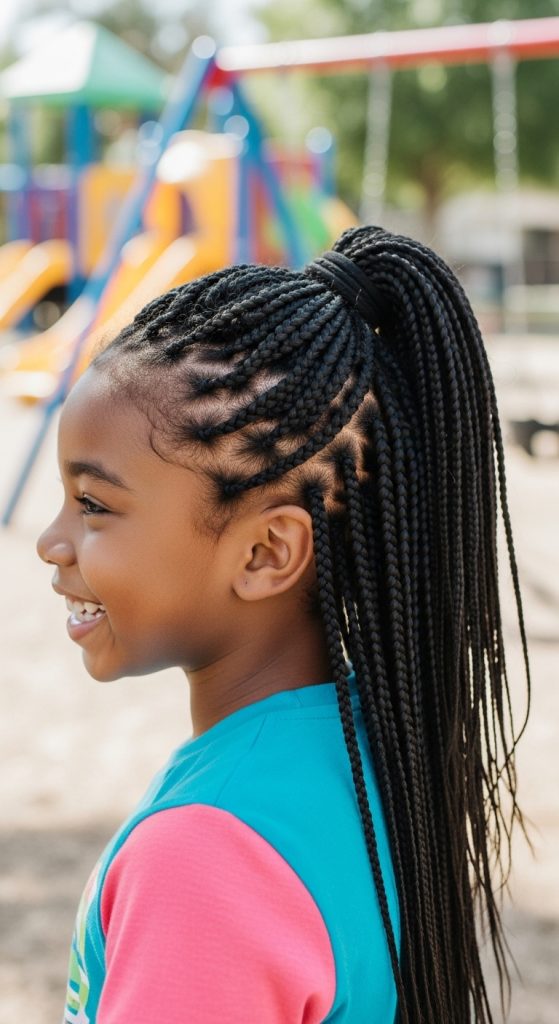
10. Box Braids in a High Bun

Introduction
A high bun created with box braids is both elegant and practical. It keeps hair secure and lifted, which is ideal for active kids who play sports or attend dance classes. The bun also highlights the neatness of the braids and creates a clean, polished appearance.
This style is quick to achieve once braids are installed and can be dressed up or down depending on accessories.
What This Style Is
Box braids gathered at the crown and wrapped into a secure bun.
Step-by-Step How to Do It
- Install box braids throughout the head.
- Gather all braids into a high ponytail.
- Secure tightly with a strong elastic band.
- Twist or wrap braids around the base.
- Secure with additional elastics or pins.
- Smooth edges with edge control.
Materials Needed
- Strong elastic band
- Bobby pins (optional)
- Edge control
- Edge brush
- Braid mousse
11. Box Braids with Heart Part Design
Introduction
Heart part box braids are a creative and adorable upgrade to traditional box braids. Instead of standard square or triangle parts, one or two sections of the scalp are shaped into a heart before braiding. This adds a playful, eye-catching design that kids absolutely love.
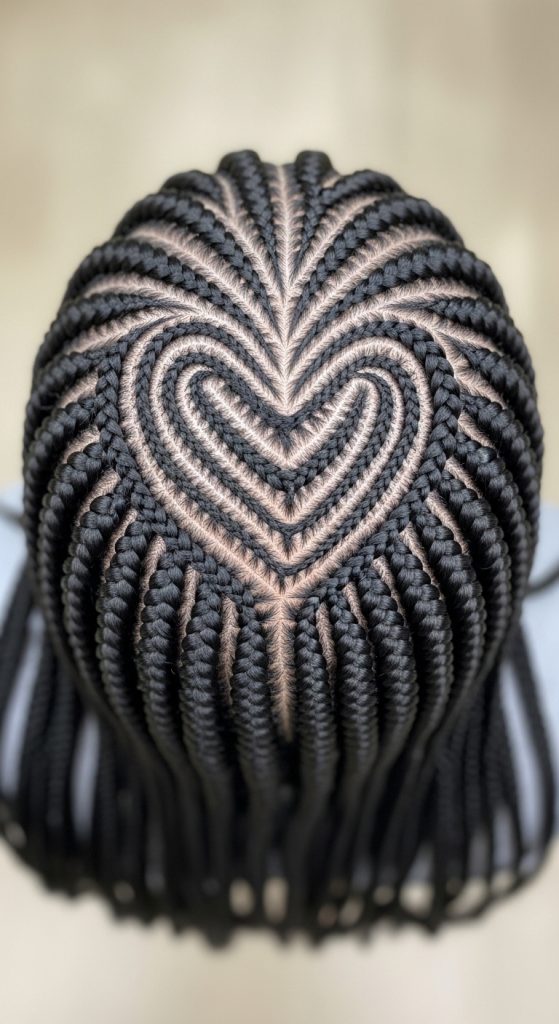
This style is especially popular for Valentine’s Day, birthdays, and school events. It gives a custom, salon-level look while still maintaining the protective benefits of box braids. The heart design can be placed on the side, at the back, or near the crown depending on preference.
What This Style Is
Traditional box braids with one or more heart-shaped scalp partings incorporated into the design.
Step-by-Step How to Do It
- Start with clean, stretched hair.
- Use a rat-tail comb to carefully draw a heart shape on the scalp.
- Clip away surrounding hair.
- Braid around the heart outline first for definition.
- Continue installing regular box braids throughout the rest of the head.
- Dip ends in hot water to seal.
- Apply mousse for a sleek finish.
Materials Needed
- Braiding hair
- Rat-tail comb
- Braiding gel
- Hair clips
- Hot water bowl
- Braid mousse
Pinterest Tip: Keep the heart design near the front for maximum visibility in photos.
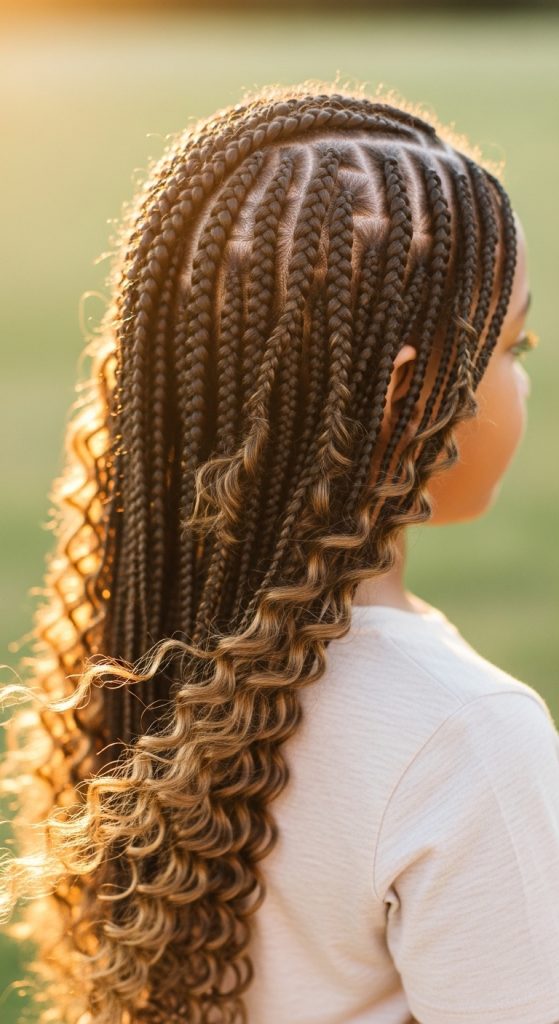
12. Boho Box Braids for Kids
Introduction
Boho box braids add a soft, trendy twist to classic braids by incorporating loose curly strands throughout the style. This look is playful, lightweight, and perfect for kids who want something slightly different from traditional neat braids.
The curly pieces add movement and texture, making this style great for special occasions, vacations, and family photos.
What This Style Is
Box braids with curly extension strands left loose at intervals for a relaxed, bohemian effect.
Step-by-Step How to Do It
- Section hair into square parts.
- Install box braids normally.
- Leave small sections of curly extension hair out while braiding.
- Continue throughout the head.
- Apply mousse lightly to curls to maintain shape.
Materials Needed
- Braiding hair
- Curly extension hair
- Rat-tail comb
- Braiding gel
- Braid mousse
Pinterest Tip: Use soft, lightweight curls to avoid tangling.
13. Side-Swept Box Braids
Introduction
Side-swept box braids create a dramatic yet elegant look. Instead of wearing braids straight down, they are styled to fall naturally over one shoulder. This style works beautifully for longer box braids and gives kids a more styled appearance without extra effort.
It’s a simple styling change that transforms the entire look.
What This Style Is
Classic box braids styled and secured slightly to one side of the head.
Step-by-Step How to Do It
- Install box braids evenly across the head.
- Part slightly to one side if desired.
- Sweep braids over one shoulder.
- Secure loosely at the back with a few discreet pins if needed.
- Smooth edges and apply mousse.
Materials Needed
- Bobby pins (optional)
- Edge control
- Edge brush
- Braid mousse
Pinterest Tip: This style looks especially elegant for formal events.
14. Box Braids with Colored Ends
Introduction
Box braids with colored ends are perfect for kids who want a fun pop of color without committing to full-head colored extensions. The color is placed only at the bottom of the braids, creating a subtle but playful gradient effect.
This is ideal for school-friendly yet trendy hairstyles.
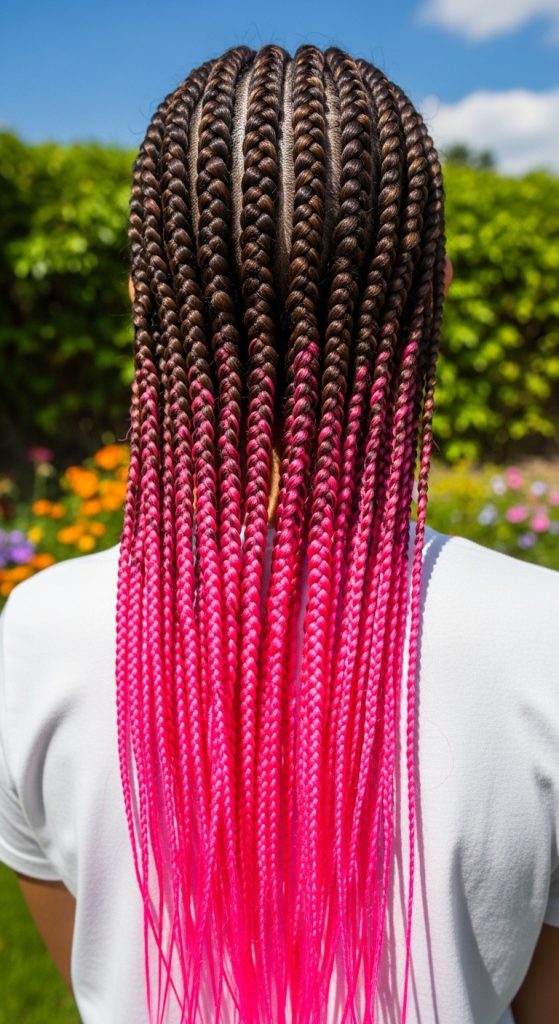
What This Style Is
Traditional box braids that transition into colored extension hair at the ends.
Step-by-Step How to Do It
- Section hair evenly.
- Begin braiding with natural or neutral extensions.
- Midway down the braid, add colored extension hair.
- Continue braiding to the ends.
- Dip in hot water to seal.
- Apply mousse.
Materials Needed
- Neutral braiding hair
- Colored braiding hair
- Rat-tail comb
- Gel
- Hot water bowl
- Braid mousse
Pinterest Tip: Bright pink, purple, or blue ends photograph beautifully outdoors.
15. Box Braids with Ribbon Accents
Introduction
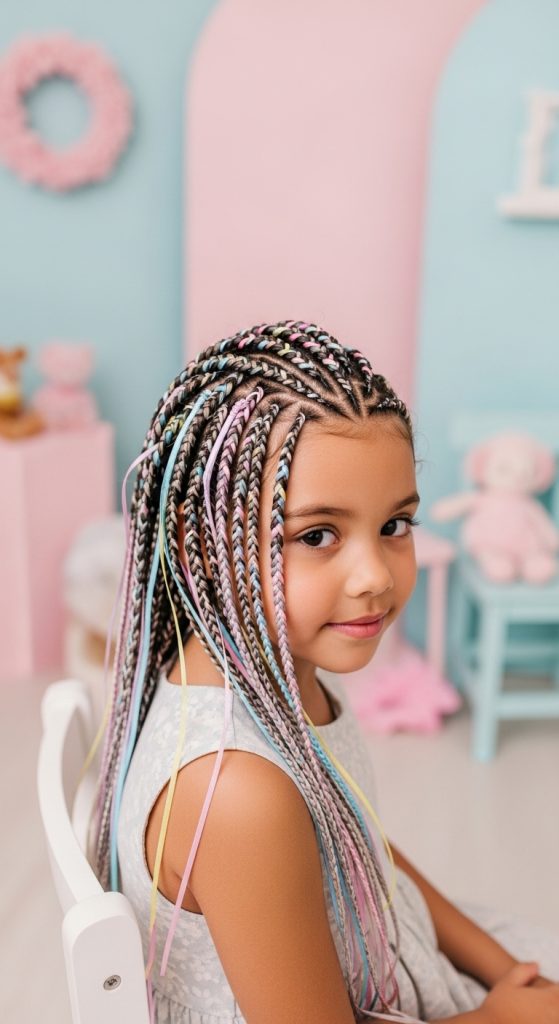
Adding ribbons to box braids creates a soft, playful, and age-appropriate finish. This style is perfect for younger kids and can be customized to match school colors or party themes.
Ribbons can be braided into select sections or tied at the ends for decoration.
What This Style Is
Classic box braids with thin ribbon strands woven into some of the braids.
Step-by-Step How to Do It
- Section hair into square parts.
- Place ribbon alongside extension hair before braiding.
- Braid normally, incorporating the ribbon evenly.
- Secure ends with elastics.
- Trim ribbon to desired length.
Materials Needed
- Braiding hair
- Thin ribbons
- Rat-tail comb
- Gel
- Elastic bands
Pinterest Tip: Satin ribbons prevent frizz and add shine.
16. Box Braids with Clear Cuffs
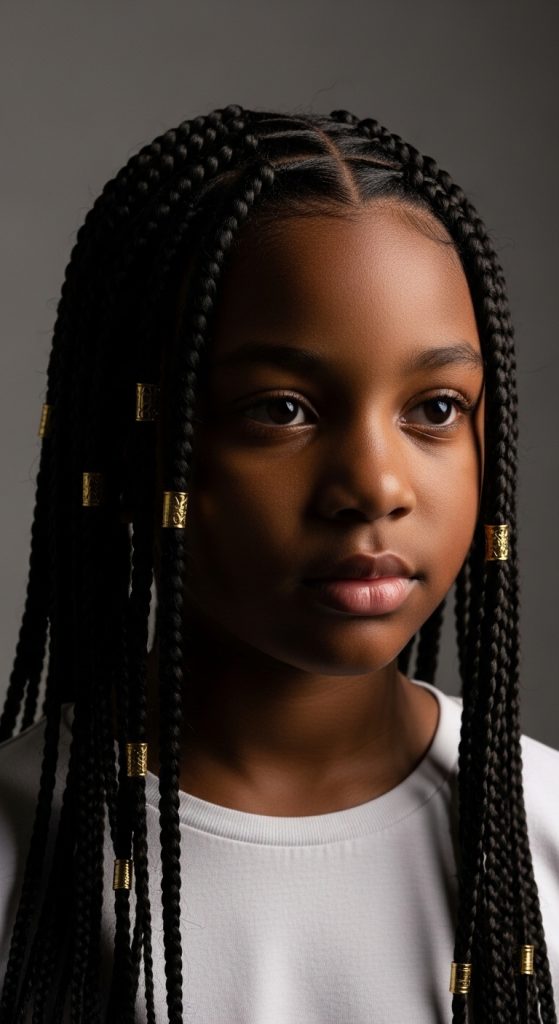
Introduction
Hair cuffs add a subtle yet stylish touch to box braids. Clear or metallic cuffs make the style look polished and trendy without overwhelming the hairstyle.
This is an easy upgrade that takes only minutes to install.
What This Style Is
Box braids decorated with decorative cuffs placed along selected braids.
Step-by-Step How to Do It
- Install box braids normally.
- Open hair cuffs gently.
- Clip them onto selected braids.
- Distribute evenly for balance.
Materials Needed
- Hair cuffs
- Box braids installed
- Edge control
Pinterest Tip: Place cuffs around the front braids to frame the face.
17. Long Waist-Length Box Braids
Introduction
Waist-length box braids create a dramatic, statement look that older kids love. While longer braids take more time to install, they offer maximum styling flexibility.
This style is ideal for vacations or long breaks from school.
What This Style Is
Box braids extended to waist length using long braiding hair.
Step-by-Step How to Do It
- Section hair evenly.
- Use long pre-stretched braiding hair.
- Braid firmly and consistently.
- Dip ends in hot water.
- Trim for uniform length.
Materials Needed
- Long braiding hair
- Rat-tail comb
- Gel
- Hot water bowl
- Mousse
Pinterest Tip: Long braids look beautiful in ponytails and buns.
18. Box Braids with Zig-Zag Parts
Introduction
Zig-zag part box braids add a creative and unique pattern to the scalp. Instead of straight lines, the parts are shaped into zig-zag designs, making the style stand out.
This is perfect for kids who want something different but still protective.
What This Style Is
Box braids installed using zig-zag parting patterns.
Step-by-Step How to Do It
- Use a rat-tail comb to create zig-zag part lines.
- Clip away sections while working.
- Apply gel at each root.
- Install braids evenly.
- Seal ends with hot water.
Materials Needed
- Braiding hair
- Rat-tail comb
- Gel
- Hair clips
- Hot water bowl
Pinterest Tip: Zig-zag parts look amazing in top-down photos.
19. Box Braids with Bangs
Introduction
Box braids with bangs create a fun, youthful look. Instead of braiding all hair straight back, a small section at the front is styled into shorter braids that fall like bangs.
This style frames the face beautifully.

What This Style Is
Box braids with a short front section styled as braided fringe.
Step-by-Step How to Do It
- Section a small front area for bangs.
- Install shorter braids in that section.
- Braid the rest of the head normally.
- Trim bangs evenly if needed.
- Apply mousse.
Materials Needed
- Braiding hair
- Rat-tail comb
- Gel
- Mousse
Pinterest Tip: Keep bangs lightweight to avoid discomfort.
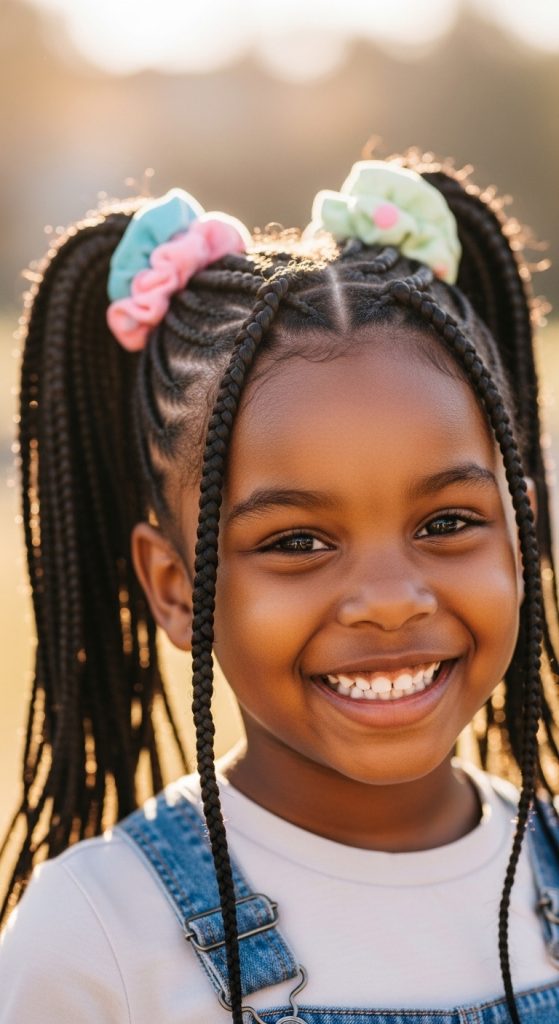
20. Box Braids Styled into Double Ponytails
Introduction
Double ponytails are playful, energetic, and perfect for younger kids. When created using box braids, they’re secure and easy to maintain. This style keeps hair controlled while still looking fun and lively.
It’s ideal for school days and active play.
What This Style Is
Box braids gathered into two high or mid-level ponytails.
Step-by-Step How to Do It
- Install box braids evenly.
- Part hair down the center.
- Gather each side into a ponytail.
- Secure with strong elastics.
- Smooth edges and add accessories if desired.
Materials Needed
- Elastic bands
- Edge control
- Edge brush
- Braid mousse