
10 Bubble Braid Hairstyles Long Hair Ideas

Bubble braid hairstyles for long hair have become a prominent feature in Pinterest ideas due to their structured appearance and simple execution. A bubble braid is created by securing sections of a ponytail or loose hair at intervals, forming rounded “bubble” shapes along the length. This technique transforms basic hairstyles into visually dynamic designs without requiring complex braiding skills. It is especially suitable for long hair because the extended length allows for multiple evenly spaced sections, enhancing the overall aesthetic.
This article presents ten bubble braid hairstyle ideas designed as practical DIY tutorials. Each idea focuses on a clear structure, combining creative ideas with step by step methods that are easy to follow. Readers will learn how to prepare the hair, section it properly, and maintain consistent spacing to achieve a balanced result. These hairstyles are useful for both casual and formal settings, offering a blend of functionality and modern design. The goal is to provide inspiration while ensuring each style remains beginner friendly, organized, and achievable.
Why This Idea Is Trending or Useful
Bubble braid hairstyles are trending because they offer a creative alternative to traditional braiding techniques. Many Pinterest ideas highlight styles that appear complex but can be created using simple methods. Bubble braids meet this requirement by delivering a structured and decorative look without requiring advanced skills.
These hairstyles provide practical value by holding their shape for extended periods. The use of multiple hair ties ensures stability, reducing the need for frequent adjustments. This makes them suitable for long days or active environments.
The DIY appeal is another important factor. Bubble braids can be created using basic materials such as hair ties and brushes. This accessibility makes them beginner friendly and easy to learn. Their adaptability allows for variations in placement, size, and design, supporting creative projects and personalization. These qualities make bubble braid hairstyles both functional and visually engaging.
Materials and Preparation
Creating bubble braid hairstyles requires a few basic materials and proper preparation. Essential tools include a brush or comb, multiple small hair ties, sectioning clips, and light styling products. These materials help maintain control and ensure consistent results.
Begin by detangling the hair thoroughly to create a smooth base. Long hair should be brushed evenly to prevent uneven sections. Sectioning the hair is an important step, especially for styles involving multiple braids or layers.
Planning the spacing between bubbles is critical for achieving a balanced look. Measure or estimate equal distances before securing each section. Use minimal styling product to maintain a natural texture while ensuring hold. Proper preparation ensures that the hairstyle remains structured, visually consistent, and long-lasting throughout the day.
Idea 1: Classic Bubble Ponytail
How to Create
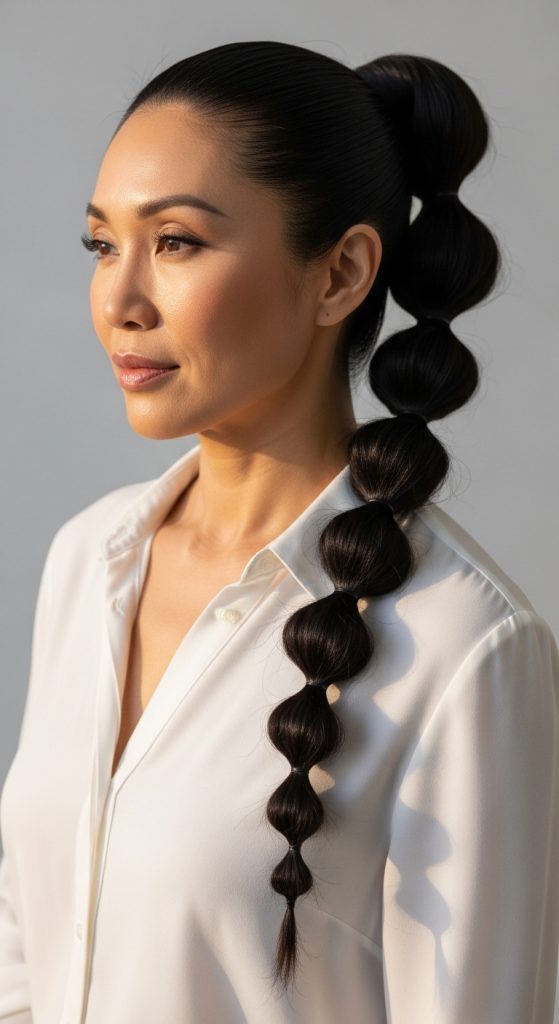
The classic bubble ponytail is a foundational bubble braid style that focuses on simplicity and structure. It transforms a standard ponytail into a visually engaging design by adding evenly spaced sections. This style is suitable for both casual and professional environments due to its clean and organized appearance.
To create this hairstyle, gather the hair into a high or mid-level ponytail and secure it with a strong hair tie. Place additional hair ties along the length of the ponytail at equal intervals. Gently pull each section outward to create rounded bubble shapes. Adjust the size of each bubble to maintain uniformity. Ensure the ponytail remains centered and smooth. This step by step method produces a balanced and polished hairstyle.
Idea 2: Double Bubble Braids
Step-by-Step Guide
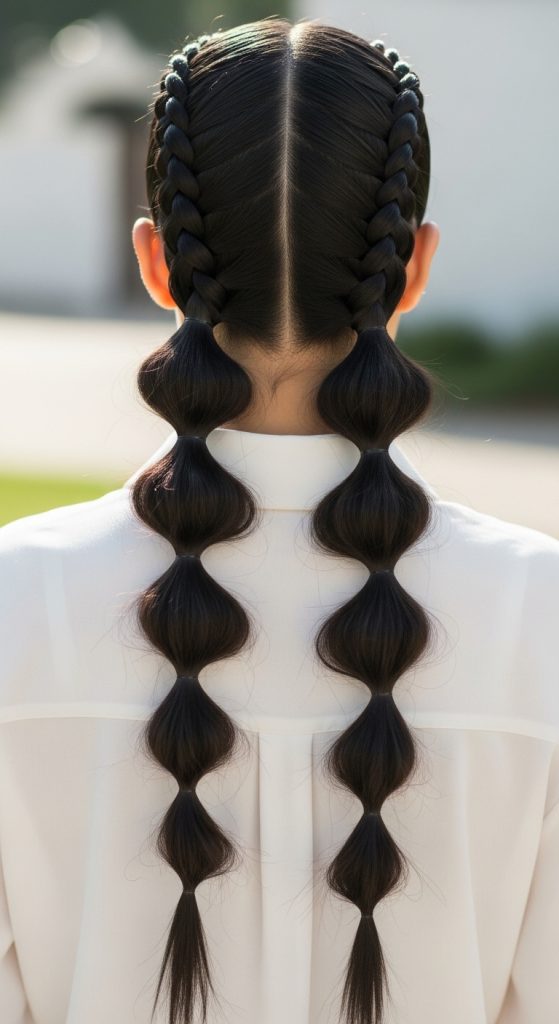
Double bubble braids involve creating two separate bubble braids on each side of the head. This style adds symmetry and visual interest while maintaining a structured layout. It is suitable for both casual and active settings.
Divide the hair into two equal sections. Secure each section into a ponytail. Add hair ties along each ponytail at regular intervals. Gently expand each section to form bubbles. Ensure both sides are evenly aligned and symmetrical. Adjust spacing as needed to maintain consistency. This method creates a coordinated and dynamic hairstyle.
Idea 3: Half-Up Bubble Braid
How to Make
The half-up bubble braid combines loose hair with a structured bubble braid section. This design balances openness with control, making it suitable for versatile styling.

Section the top half of the hair and secure it into a ponytail. Create bubble sections along the length of this ponytail using additional ties. Leave the remaining hair loose. Adjust the bubbles to ensure even spacing and shape. This approach creates a balanced and visually appealing hairstyle.
Idea 4: Low Bubble Braid
Execution Process
A low bubble braid positions the braid at the nape of the neck, creating a relaxed and elegant appearance. This style emphasizes simplicity while maintaining structure.

Gather the hair into a low ponytail and secure it. Add hair ties along the length, spacing them evenly. Expand each section to form bubbles. Ensure the braid remains centered and smooth. This method produces a clean and refined hairstyle suitable for formal settings.
Idea 5: Bubble Braid with Ribbon
How to Create
Adding a ribbon to a bubble braid introduces a decorative element that enhances the overall design. This style combines structure with additional detail, creating a more expressive look.
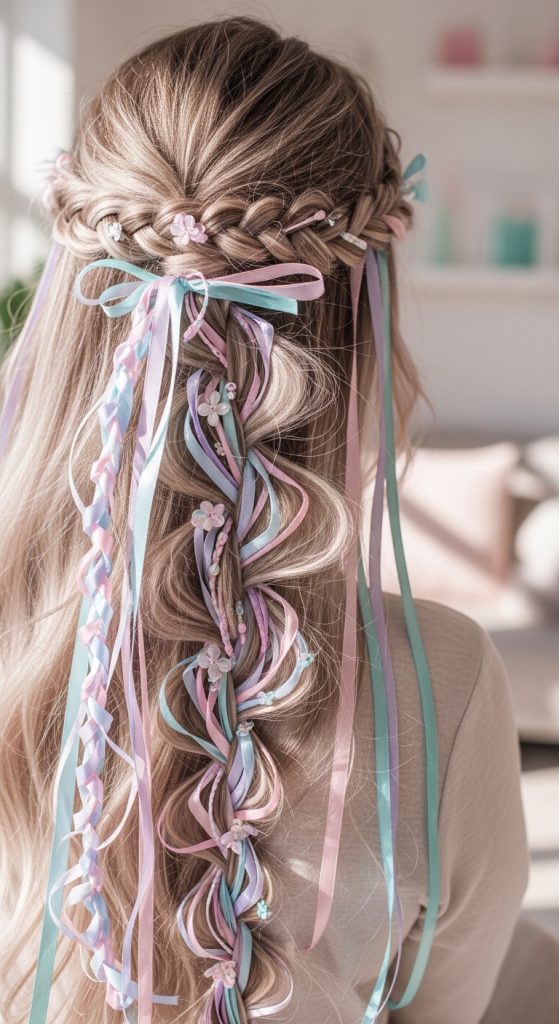
Secure the hair into a ponytail and attach a ribbon at the base. Create bubble sections along the length, incorporating the ribbon into each segment. Ensure the ribbon remains evenly aligned. Adjust the bubbles to maintain balance. This method creates a visually detailed and cohesive hairstyle.
Idea 6: High Bubble Braid with Volume
Setup Method

A high bubble braid with added volume focuses on creating lift at the crown while maintaining structured bubbles. This style enhances the overall shape and presence of the hairstyle.
Tease the crown area slightly to create volume. Gather the hair into a high ponytail and secure it. Add hair ties along the length and expand each section. Ensure the bubbles are evenly spaced and the crown remains lifted. This method creates a bold and structured hairstyle.
Idea 7: Side Bubble Braid

How to Make
The side bubble braid shifts the braid to one side, creating an asymmetrical yet balanced design. This style adds variation while maintaining simplicity.
Gather the hair to one side and secure it into a ponytail. Create bubble sections along the length using additional ties. Expand each section to form rounded shapes. Adjust the braid position to maintain balance. This method produces a unique and structured hairstyle.
Idea 8: Multi-Layer Bubble Braid
Step-by-Step Guide
A multi-layer bubble braid involves creating multiple bubble braids within the same hairstyle. This design adds complexity and depth while maintaining organization.
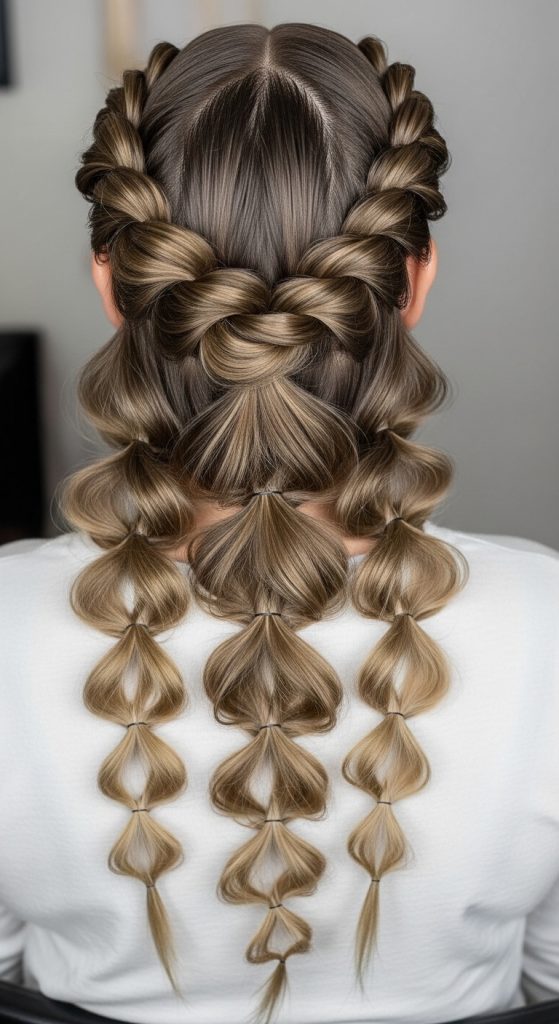
Divide the hair into sections and create separate bubble braids for each section. Secure each braid with ties at regular intervals. Adjust the spacing to ensure consistency. Combine or leave the braids separate depending on the desired look. This method creates a detailed and layered hairstyle.
Idea 9: Bubble Braid with Twists

How to Create
This style combines twisting techniques with bubble braids to add texture and variation. It enhances the visual complexity while remaining manageable.
Twist sections of hair before securing them into a ponytail. Create bubble sections along the twisted hair using ties. Expand each section to form bubbles. Ensure the twists remain intact and evenly aligned. This method produces a textured and structured hairstyle.
Idea 10: Loose Bubble Braid Style
Execution Process
The loose bubble braid style focuses on creating softer and more relaxed bubbles. This design emphasizes a natural appearance while maintaining structure.
Secure the hair into a ponytail and add ties at wider intervals. Gently expand each section to create larger, softer bubbles. Allow some strands to remain loose for a relaxed effect. Adjust the spacing to maintain balance. This method creates a casual and approachable hairstyle.

Common Beginner Mistakes and How to Avoid Them
One common mistake is uneven spacing between hair ties, which results in inconsistent bubble sizes. Always measure or estimate equal distances before securing each section. Another issue is insufficient detangling, which can cause uneven shapes and difficulty in styling.
Using too much tension when securing ties can flatten the bubbles. Maintain moderate tension to allow proper shaping. Skipping adjustments after creating each bubble can lead to an unbalanced look. Always refine each section before moving to the next.
Avoiding these mistakes ensures a consistent and visually appealing result.
Practical Tips for Better Results
Use small, matching hair ties to maintain a clean appearance. Work in a well-lit area to ensure accurate spacing and alignment. Adjust each bubble gradually to achieve the desired shape.
Keep the hair smooth before securing ties to prevent uneven sections. Practice creating evenly spaced sections to improve efficiency.
These tips help achieve a structured and professional result while maintaining simplicity.
Styling, Presentation, or Organization Ideas
Coordinate bubble braid styles with outfits to create a cohesive appearance. Use consistent spacing and alignment to maintain visual balance. Arrange the braid to complement facial features and overall look.
Keep tools organized and accessible to improve efficiency during styling. Maintain a clean workspace to simplify the process.
Proper presentation enhances both functionality and aesthetic value.
Budget or Time Planning
Bubble braid hairstyles require minimal materials, making them suitable for budget ideas. Basic tools such as hair ties and brushes are sufficient for most styles.
Plan the hairstyle based on available time. Simple bubble braids can be completed quickly, while more detailed designs may require additional time.
Efficient planning ensures that the hairstyle can be completed without delays while maintaining quality.
Creative Expansion and Advanced Inspiration
Expand bubble braid styles by combining them with other techniques such as braiding or twisting. Experiment with different placements and spacing to create new variations.
Incorporate accessories or layered designs to enhance complexity. Explore advanced structures to develop unique and personalized styles.
Continuous experimentation allows for creative growth while maintaining a structured approach to hairstyling.