
10 Prom Hairstyles Bun

Prom hairstyles bun styles remain one of the most searched Pinterest ideas each year because they combine elegance, structure, and practicality for formal events. A bun hairstyle refers to hair gathered and secured into a rounded shape, usually positioned at the back or top of the head.
This style keeps hair controlled while highlighting facial features, necklines, and accessories. On Pinterest, bun hairstyles appear frequently in prom inspiration boards because they complement a wide range of dresses, from classic gowns to modern minimalist styles. The bun also works well with many hair textures including straight, wavy, and curly hair.
This article introduces ten prom bun hairstyle ideas designed as practical and beginner friendly styling concepts. Each hairstyle focuses on a clear design approach with a step by step explanation of how the bun can be created at home or prepared with basic styling tools. These creative ideas demonstrate how twisting, braiding, and sectioning techniques help build elegant bun structures that remain secure throughout the evening. Readers will also learn how preparation, hair organization, and simple accessories contribute to the final aesthetic. The goal is to provide clear inspiration and practical guidance for creating a prom bun hairstyle that feels polished, balanced, and suitable for a formal event.
Why This Idea Is Trending or Useful
Prom bun hairstyles continue to appear as trending ideas on Pinterest because they provide both functional stability and a refined aesthetic suitable for formal events. Prom nights typically involve extended periods of activity, including dancing, photographs, and social interaction. Hairstyles that remain secure and comfortable throughout the evening are therefore essential. Bun styles solve this problem by gathering the hair into a structured form that stays in place with the help of pins and ties. This controlled structure prevents hair from falling across the face while maintaining an elegant appearance.
Another reason bun hairstyles are widely shared in Pinterest inspiration collections is their adaptability. Buns can be styled in many ways including low buns, high buns, braided buns, and textured buns. Each variation allows personalization while maintaining the basic structure of the hairstyle. These styles also work well as DIY projects because they rely on simple techniques such as twisting or wrapping hair around a base. Many beginners can follow step by step tutorials to recreate these styles without professional assistance. This accessibility makes prom bun hairstyles practical creative projects that combine ease of preparation with visually appealing results.
Materials and Preparation
Creating a prom bun hairstyle requires several essential materials and preparation steps to ensure the style holds securely throughout the event. Basic hairstyling materials include hair ties, bobby pins, sectioning clips, a fine comb, and hair spray. A curling iron or straightener may be used to prepare hair texture before styling. Slight waves or curls often help buns maintain shape because textured hair provides more grip for pins. Decorative accessories such as pearl pins, minimalist combs, or small floral clips can enhance the aesthetic of the hairstyle without overpowering the design.
Preparation begins with clean, dry hair that has been brushed to remove tangles. Light texturizing can be added by curling sections of hair before forming the bun. Next, divide the hair into manageable sections using clips. Sectioning improves control during the styling process and helps create balanced bun structures. Planning the bun position in advance is also important because the placement affects the overall look of the hairstyle. Low buns emphasize elegance and simplicity, while higher buns create volume and height. Preparing materials and organizing hair sections before beginning the style helps the process remain efficient and ensures the final bun appears polished and stable.
MAIN IDEAS
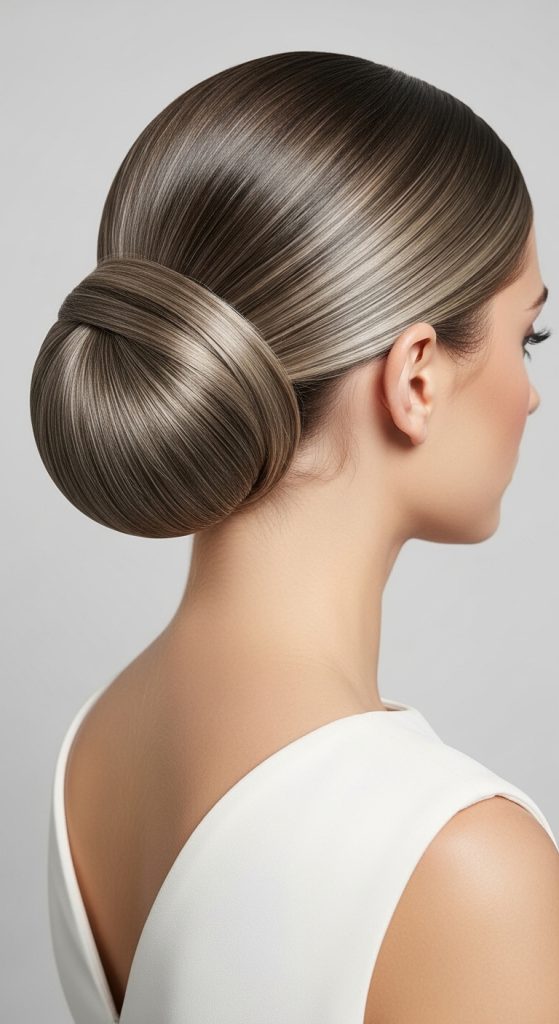
Idea 1: Classic Low Prom Bun
How to Create

The classic low prom bun is one of the most traditional formal hairstyles because it creates a balanced and polished appearance. This style gathers the hair at the nape of the neck and forms a smooth circular bun that complements elegant gowns. The low position highlights the neckline and shoulders while maintaining a refined silhouette. This bun works well with both straight and slightly wavy hair textures. Because of its clean shape, the style pairs easily with decorative hair accessories such as minimalist pins or combs.
To create this bun, begin by brushing the hair thoroughly to remove tangles. Gather the hair into a low ponytail positioned just above the neckline. Secure the ponytail with a hair tie. Twist the ponytail gently until the hair forms a coil. Wrap the twisted hair around the base of the ponytail to create a round bun shape. Use bobby pins evenly around the bun to secure the structure. Smooth loose strands with a comb and apply light hair spray for hold. The result is a stable bun hairstyle that remains elegant and comfortable throughout the evening.
Idea 2: Textured Prom Bun
How to Create

A textured bun introduces volume and softness to the traditional bun structure. Instead of appearing tightly wrapped, this style allows gentle movement and layered texture throughout the hair. The textured appearance creates a more relaxed aesthetic while still maintaining the formal qualities expected for prom hairstyles. This design works particularly well with hair that has been lightly curled before styling.
Start by curling several sections of the hair to add natural texture. Gather the hair into a mid-level ponytail. Divide the ponytail into smaller sections and twist each piece loosely. Wrap each twisted section around the base of the ponytail, securing them with bobby pins. Allow small sections to remain slightly loose to create a soft layered appearance. Adjust the twists to distribute volume evenly across the bun. Finish with light hair spray to maintain structure while preserving the textured effect.
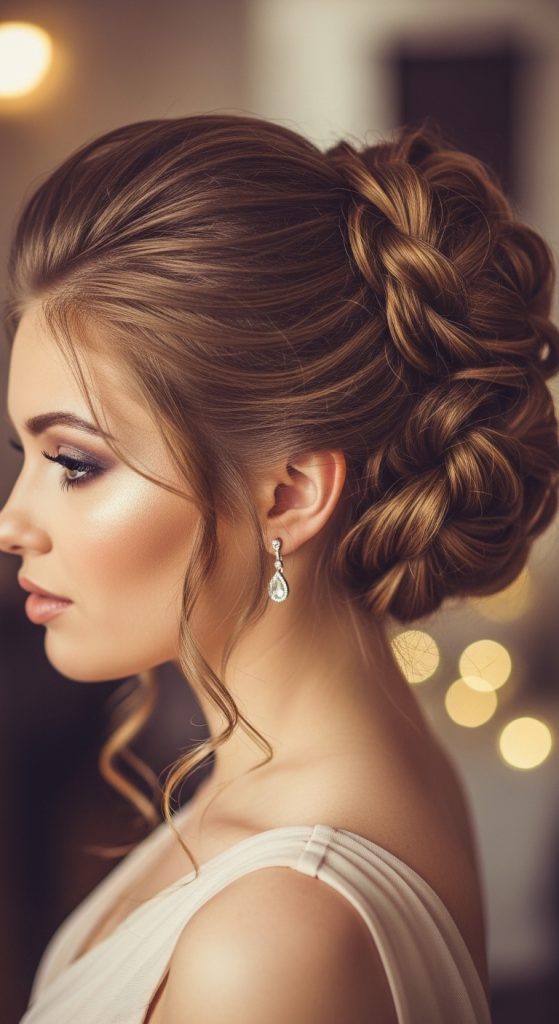
Idea 3: Braided Prom Bun
How to Create

The braided bun adds decorative detail to the traditional bun hairstyle by incorporating braiding techniques. The braid creates visible texture that enhances the overall design. This style works well for prom because it combines elegance with intricate visual structure.
Begin by gathering the hair into a low ponytail. Divide the ponytail into three equal sections and braid the hair to the ends. Secure the braid with a small hair tie. Wrap the braid around the base of the ponytail to form a circular bun. Use bobby pins to secure the braid evenly around the bun. The braid remains visible, creating a decorative texture that enhances the hairstyle.
Idea 4: High Prom Bun
How to Create

A high bun creates height and volume by positioning the bun near the crown of the head. This elevated placement draws attention upward and works well with dresses that feature dramatic necklines or open shoulders. The high bun creates a structured yet balanced appearance.
Gather the hair into a high ponytail positioned near the crown. Twist the ponytail until it begins to coil. Wrap the twisted hair around the base of the ponytail to form the bun. Secure the bun with bobby pins and adjust the shape until it appears symmetrical. Apply hair spray for additional hold.
Idea 5: Loose Romantic Bun
How to Create
The loose romantic bun focuses on softness and natural movement rather than strict structure. This style often includes gentle curls and small face framing strands that soften the overall appearance.

Begin by curling sections of the hair to create loose waves. Gather the hair loosely at the back of the head and form a relaxed bun shape. Secure the bun with pins while allowing some curls to remain visible. Leave small strands around the face for a romantic effect.
Idea 6: Side Bun Prom Hairstyle
How to Create

A side bun places the bun slightly to one side of the head instead of centered at the back. This asymmetrical design introduces visual interest while maintaining the practicality of a bun hairstyle.
Gather the hair into a low side ponytail positioned behind one ear. Twist the ponytail and wrap it into a bun shape. Secure the bun with pins and adjust the shape for balance.
Idea 7: Twisted Bun Updo
How to Create
The twisted bun uses multiple hair sections twisted together to form a layered bun. This technique adds depth and visual texture.
Divide the hair into several sections. Twist each section individually and wrap the twists together at the back of the head to form a bun. Secure each twist with pins.
Idea 8: Elegant Chignon Bun
How to Create

The chignon bun is a refined hairstyle positioned low at the back of the head. It features smooth structure and subtle volume.
Gather the hair into a low ponytail and twist the hair upward. Fold the twist inward and secure it with pins to create the chignon shape.
Idea 9: Curly Prom Bun
How to Create

A curly bun highlights natural curls by gathering them into a soft rounded shape. This style emphasizes texture and volume.
Curl the hair before styling. Gather the curls into a bun at the back of the head and secure them loosely with pins so the curls remain visible.
Idea 10: Minimalist Sleek Bun
How to Create
The minimalist sleek bun focuses on smooth lines and a clean shape. This style works well with modern dresses that feature simple silhouettes.
Straighten the hair and gather it into a tight low ponytail. Wrap the ponytail into a smooth bun and secure it with pins. Apply hair spray to maintain the sleek appearance.
Common Beginner Mistakes and How to Avoid Them
Many beginners create bun hairstyles without enough structural support. Insufficient pins can cause sections of hair to loosen during the evening. Placing pins in different directions improves stability. Another common mistake involves forming buns with hair that is too smooth, which causes slipping. Light texture improves grip and helps maintain the shape.
Practical Tips for Better Results
Successful bun hairstyles depend on balanced sectioning and careful placement. Dividing the hair before styling helps maintain symmetry. Using mirrors to check the bun from multiple angles ensures a balanced appearance.
Styling, Presentation, or Organization Ideas
Hair accessories can enhance prom bun hairstyles when used thoughtfully. Pearl pins, decorative combs, and minimalist clips provide subtle decoration that complements the bun.
Budget or Time Planning
Many bun hairstyles can be completed at home using basic hairstyling tools. Practicing the hairstyle before prom helps reduce preparation time and ensures confidence during the final styling.
Creative Expansion and Advanced Inspiration
Advanced bun styles can combine braids, twists, and decorative accessories to create personalized variations. Experimenting with placement and texture allows unique interpretations of classic bun hairstyles.