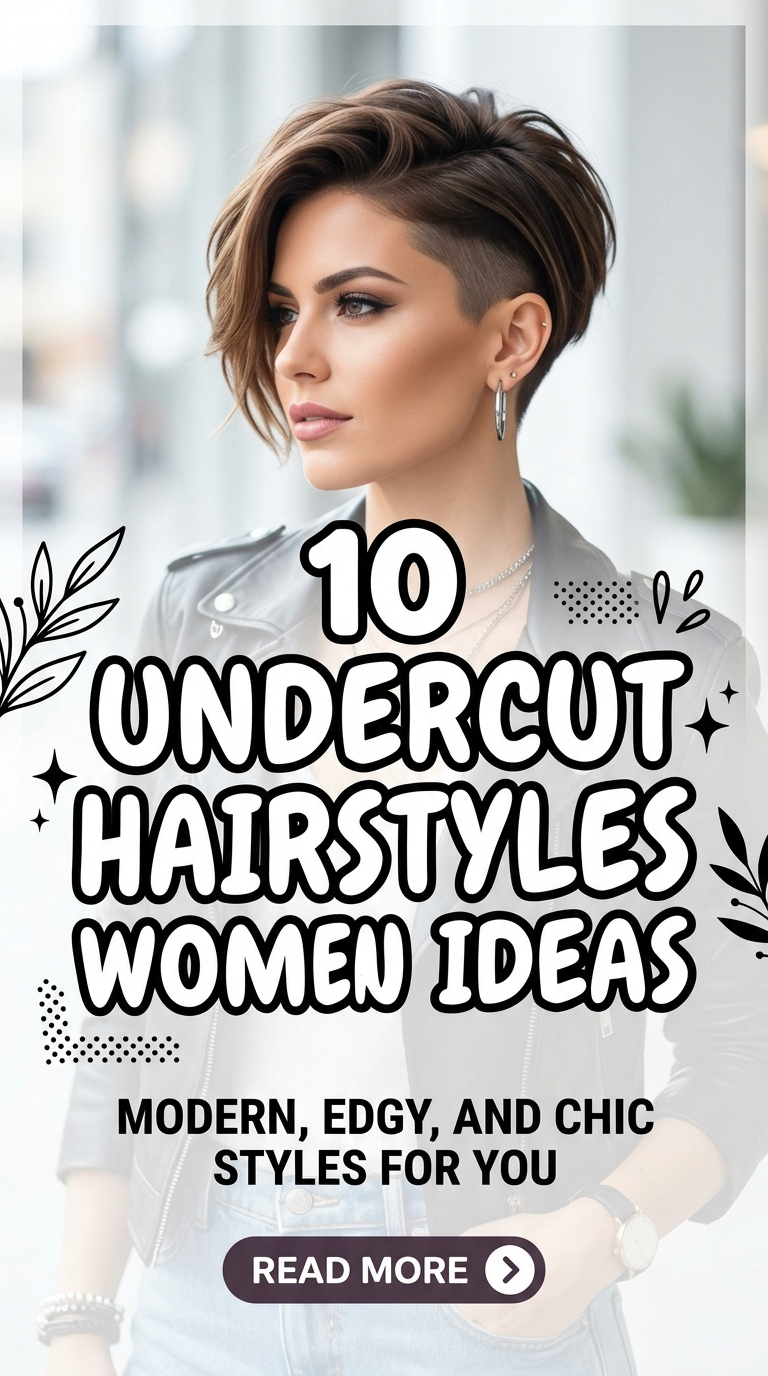
10 undercut hairstyles women ideas

Undercut hairstyles for women have become a strong visual trend across Pinterest ideas due to their bold structure and adaptable styling options. This haircut technique involves shaving or trimming a section of hair while leaving the rest longer, creating contrast and dimension. It supports modern design preferences by combining edgy elements with soft or feminine styles. This article provides a complete tutorial on how to approach undercut hairstyles step by step, including planning, styling, and maintenance. Readers will learn how to select suitable undercut placements, blend textures, and maintain balance between shaved and longer sections. These ideas are useful for individuals looking for a creative project that transforms their overall appearance while remaining manageable in daily routines. The designs included are beginner friendly in concept, with clear explanations to help guide decisions before making permanent changes. Undercut hairstyles offer flexibility, allowing both subtle and bold looks depending on personal preference and styling approach.
Why This Idea Is Trending or Useful
Undercut hairstyles are trending because they align with current Pinterest inspiration focused on individuality and modern aesthetic expression. These styles offer practical value by reducing bulk in thick hair and improving comfort, especially in warmer climates. The contrast created by shaved sections adds visual interest without requiring complex daily styling. This makes undercuts both functional and visually appealing. The DIY appeal is present in maintenance, as trimming and shaping can be done at home with proper tools and planning. These hairstyles are also accessible for beginners because they can start with small, hidden undercuts before exploring more visible designs. The flexibility of undercut styles allows them to be adapted to different hair lengths, textures, and face shapes. This adaptability supports long-term use and reduces the need for frequent changes. The combination of practicality, creative expression, and modern design relevance makes undercut hairstyles a consistent feature in trending ideas.
Materials and Preparation
Preparing for an undercut hairstyle requires careful planning, proper tools, and an understanding of the desired design. Essential materials include hair clippers with adjustable guards, a comb, hair clips for sectioning, a mirror for visibility, and a cape or towel for cleanliness. Additional tools such as scissors and a fine comb help refine edges and blending. Begin by identifying the section of hair that will be shaved or trimmed. This may include the nape, side, or a hidden layer beneath longer hair. Clean and dry hair before starting to ensure accurate cutting. Planning involves selecting the depth and shape of the undercut, considering how it will blend with the remaining hair. Section the hair carefully using clips to separate the undercut area from the rest. This preparation step is essential for achieving clean lines and avoiding uneven results. Proper organization of materials and clear planning ensures a smooth and controlled execution process.
Idea 1: Hidden Nape Undercut
How to Create
The hidden nape undercut is a subtle style where the shaved section is located at the back of the head, beneath longer hair. This design allows the undercut to remain concealed when the hair is down, making it suitable for individuals seeking a balanced and adaptable look. It supports minimalist style while still offering a creative edge. The hidden placement provides flexibility, allowing the wearer to reveal or conceal the design depending on styling. This makes it a practical option for both casual and formal settings.

To create this style step by step, section the hair horizontally at the nape using clips to secure the upper portion. Use clippers with a suitable guard length to shave the lower section evenly. Start from the base of the neck and move upward in controlled strokes. Ensure that the line separating the undercut from the longer hair is clean and straight. Check symmetry using a mirror. Once complete, release the top layer of hair to cover the undercut. This easy project requires careful sectioning and steady handling of tools to achieve a clean result.
Idea 2: Side Undercut with Long Hair
How to Create

This style features a shaved section on one side of the head, creating a strong contrast with longer hair on the opposite side. It emphasizes asymmetry and modern design, making it visually dynamic. The side undercut works well with straight, wavy, or curly hair, allowing versatility in styling.
To achieve this look, decide which side will be shaved and section the hair accordingly. Secure the longer portion with clips. Use clippers to shave the selected side evenly, maintaining consistent pressure. Blend the transition area if needed. Style the longer hair to enhance contrast. This setup method creates a bold yet controlled appearance.
Idea 3: Geometric Pattern Undercut
How to Create

This design incorporates patterns into the undercut, adding detail and personalization. Shapes such as lines or angles create visual interest.
To create, shave the base area first, then use a smaller trimmer to carve patterns. Work slowly to maintain precision. Clean edges carefully.
Idea 4: Undercut Bob Style
How to Create
This idea combines a classic bob haircut with an undercut for added dimension. It reduces bulk and enhances structure.

To achieve, create a nape undercut and cut the remaining hair into a bob shape. Ensure even length and smooth blending.
Idea 5: Curly Hair Undercut
How to Create

An undercut in curly hair helps manage volume while maintaining texture. It creates a balanced shape.
Section the lower portion and shave carefully. Leave curls intact above for contrast. Maintain hydration for healthy curls.
Idea 6: Undercut Ponytail Style
How to Create
This style reveals the undercut when hair is tied up. It adds a dynamic element to simple hairstyles.
Create a nape undercut and style hair into a ponytail. Ensure clean lines for visibility.

Idea 7: Double Side Undercut
How to Create
This design includes shaved sections on both sides, creating symmetry. It offers a bold and structured look.

Section both sides evenly and shave using clippers. Maintain equal length for balance.
Idea 8: Undercut with Design Fade
How to Create
This style uses gradual fading for a softer transition. It blends the undercut into longer hair.

Use multiple clipper guards to create a gradient effect. Blend carefully for smooth results.
Idea 9: Pixie Cut Undercut
How to Create

A pixie cut with an undercut creates a short and manageable style with added edge.
Cut hair into a pixie shape and shave selected sections. Blend edges for a clean finish.
Idea 10: Undercut with Long Layers

How to Create
This style combines long layered hair with a hidden undercut. It adds movement and reduces weight.
Create a subtle undercut and add layers to the remaining hair. Ensure smooth transitions.
Common Beginner Mistakes and How to Avoid Them
A common mistake is improper sectioning, which can lead to uneven cuts. Clear separation of hair sections is essential. Using incorrect clipper guard lengths may result in inconsistent results, so selecting the appropriate size is important. Rushing the process can cause uneven lines, so steady and controlled movements are necessary. Regular checks using a mirror help maintain symmetry.
Practical Tips for Better Results
Use sharp and clean tools for precise cutting. Work in small sections to maintain control. Practice on a small area before committing to a larger design. Maintain consistent pressure when using clippers.
Styling, Presentation, or Organization Ideas
Style the longer hair to highlight or conceal the undercut as needed. Use simple styling techniques such as tying or parting hair to change the look. Keep tools organized for easy access.
Budget or Time Planning
Use basic tools to reduce costs. Plan the design before starting to avoid mistakes. Complete the process in stages to maintain accuracy.
Creative Expansion and Advanced Inspiration
Experiment with patterns and fades for more complex designs. Combine undercuts with different hairstyles to create unique variations. Explore different placements to expand styling options.